Telephone/WhatsApp:+86 156 2656 0610

Telephone/WhatsApp:+86 156 2656 0610
Email:seekmach@gmail.com

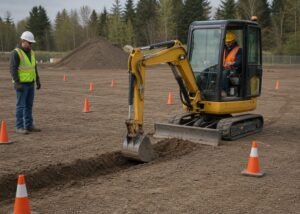
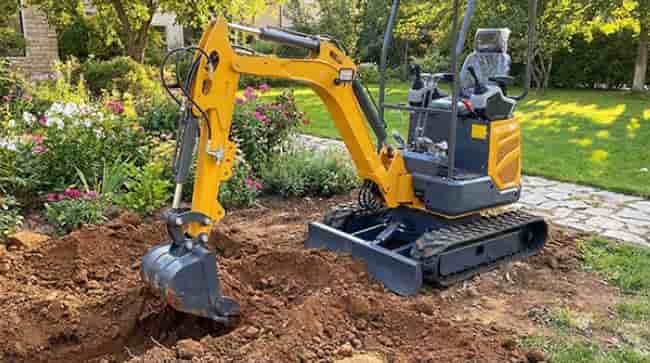
Every hour your mini excavator runs, its undercarriage is quietly absorbing punishment — and quietly accumulating cost. excavator tracks, along with the rollers, idlers, and sprockets they interact with, represent the single most expensive wear component on any tracked machine. According to Equipment World, the undercarriage alone can account for up to 50% of an excavator’s total lifetime maintenance costs. That’s not a rounding error. That’s half your machine budget riding on rubber and steel.
The difference between proactive track replacement and reactive repair isn’t a matter of preference — it’s a matter of thousands of dollars.
Waiting for a track to snap mid-job doesn’t just mean downtime. It means emergency service calls, potential damage to rollers and sprockets, and a halted project that ripples into schedule penalties. On the other hand, worn tracks quietly drain fuel efficiency and compromise machine stability on slopes and uneven terrain — risks that compound silently until something gives.
A professional solution isn’t always a dealer service bay. For fleet operators and owner-operators who understand their equipment, a disciplined DIY replacement approach is increasingly recognized as a legitimate standard for managing costs and maximizing longevity. Knowing when to act, however, is just as critical as knowing how — and that starts with learning to read your tracks before they fail you.
Replacing mini excavator tracks too early wastes money; waiting too long risks catastrophic failure mid-job — or worse, a safety incident. Developing a sharp diagnostic eye is the skill that separates reactive operators from professionals who control their maintenance costs.
Run a methodical visual inspection before every major job. Look for these red flags:
This is the line you absolutely cannot cross. According to ForConstructionPros.com, rubber tracks require replacement when internal steel cords become exposed or when tread depth drops below 20% of its original height. That 20% threshold isn’t arbitrary — below it, the track loses meaningful grip, and the thin remaining rubber offers almost no protection to the steel reinforcement underneath.
Once moisture reaches exposed steel cords, oxidation begins rapidly. Rust expands inside the rubber matrix, accelerating delamination and weakening the entire track structure from the inside out. At that point, you’re not running on borrowed time — you’re running on borrowed luck.

Choosing the right replacement before reaching that threshold matters enormously. Consulting a reliable track selection guide ensures you’re matching load rating, pitch, and width to your specific machine’s demands.
With your inspection complete and replacement confirmed, the very next priority — before a single bolt turns — is setting up your worksite safely.
Before any mini excavator track replacement diy project begins, getting the machine safely elevated is the most critical — and most frequently underestimated — step. Skipping proper support protocols doesn’t just risk equipment damage; it can be fatal.
⚠️ SAFETY WARNINGNever rely solely on the machine’s hydraulics to hold the excavator elevated. Hydraulic systems can experience pressure loss, valve failure, or seal degradation without warning. OSHA safety standards mandate the use of heavy-duty jack stands or wooden cribbing blocks as secondary support whenever equipment is elevated for maintenance. Hydraulics fail — cribbing doesn’t.
Properly elevating a mini excavator uses the machine’s own blade and boom in a controlled sequence:
Once the machine is supported, clear the immediate area and designate a “no-go zone” — at minimum six feet in every direction — for non-essential personnel. Post visible markers or cones. Loose track under tension can snap or spring unexpectedly, turning hardware into a projectile.
With the machine stable and the area secured, you’re ready to move into the actual replacement process — which follows a precise sequence that professionals rarely deviate from.
With your machine safely elevated and cribbed, you’re ready for the most hands-on phase of the job. To successfully replace mini excavator tracks, follow this sequence precisely — skipping or rushing any step dramatically increases the risk of injury and rework.
Locate the grease valve on the track adjuster, typically accessible through an inspection port on the front side of the track frame. Using the correct-sized wrench, slowly back out the valve — never remove it completely. As grease releases, the front idler retracts, slackening the track. This is a critical, controlled process; releasing grease too quickly can send the fitting flying under pressure.
Watch this process in action: DIY Track Changing For Your Excavator – NO Hydraulic Pin Press
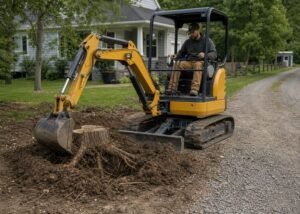
Work the track off the drive sprocket first using a heavy pry bar. Position the excavator so a sprocket tooth gap aligns with the track, then lever the track links off tooth by tooth. Once it’s free of the sprocket, walk the slack toward the idler and pry the track off the front. Gravity and a second set of hands make this significantly easier on wider tracks.
Remove all packed mud, rock, and compacted debris from every roller, the idler, the sprocket teeth, and the track frame rails before the new track goes on. This step is frequently skipped — and it’s the reason many replacement tracks wear prematurely. A pressure washer, wire brush, and scraper should all be in your toolkit here. Check rollers for flat spots or seal leaks while the undercarriage is exposed. Tools like those available at SeekMach can make inspection and maintenance work more efficient at this stage.
Drape the new track over the drive sprocket first, aligning the track links carefully with the sprocket teeth. This is the anchor point — get it right and the rest follows naturally. Then pull the track forward along the bottom rollers and loop it over the front idler. The track should sit centered on all rollers before you proceed.
Apply initial tension by slowly pumping grease back into the adjuster until the track has slight tension but remains visibly loose. According to the Association of Equipment Manufacturers (AEM), running a track too tight can cause power loss and excessive wear on the rollers, idlers, and drive motor — so resist the urge to fully tension at this stage.
Getting the tension exactly right is its own science — and that’s precisely where the next step of this process becomes critical.
With your new track seated on the undercarriage, the installation isn’t finished — it’s just entered its most technically precise phase. Proper tensioning is where good excavator track maintenance separates professionals from amateurs, and getting it wrong costs real money in either direction.
The gold standard measurement is the mid-track sag: the vertical distance between your lowest mid-roller and the underside of the track at its midpoint. For most mini excavators, the target sag range falls between 1/4 inch and 3/4 inch (6–19mm). Always consult your OEM manual first — some manufacturers specify tighter tolerances.
The correct sag zone keeps the track seated securely while allowing enough give to absorb ground shock.
| Condition | Symptoms | Risk |
|---|---|---|
| Too Tight | Stiff travel, excess heat | Drive motor burnout, accelerated sprocket wear |
| Too Loose | Visible slack, slapping sound | De-tracking, frame and edge damage |
| Just Right | Smooth travel, proper sag | Maximum component longevity |
According to AEM industry guidance, a track that’s too loose can cause de-tracking, which frequently damages both track edges and the undercarriage frame — a repair that easily overshadows the cost of the replacement itself.
Environmental conditions genuinely change the equation. In muddy or clay-heavy sites, run your tracks slightly looser to allow debris to clear the sprocket. In rocky terrain, tighten toward the firmer end of the spec range to prevent the track from bouncing off obstacles.
Once you’ve dialed in the right tension, the next challenge is keeping it there — which is exactly where post-installation habits make all the difference.
A fresh set of tracks represents a real investment — protecting that investment starts the moment the machine rolls off the crib stands. Undercarriage ROI isn’t just about the initial swap; it’s about the daily and weekly habits that determine whether your tracks last 800 hours or push past 1,500.
Daily (after every shift):
Weekly:
Abrasive debris left sitting in the undercarriage can accelerate wear on rollers and idlers by up to 30%, according to Industry Maintenance Standards — making those post-shift wash-downs far more valuable than they appear.
Operator behavior is equally critical. Avoid aggressive counter-rotations (pivot turns) on concrete or asphalt, and limit high-speed travel on hard surfaces. Both habits shred rubber compounds faster than almost any other variable.
Don’t overlook sprocket condition. Worn, hooked teeth act like a file against your new track’s drive lugs, destroying in 200 hours what should last 1,000. If teeth look asymmetrical, replace the sprocket before it kills another set of tracks.
Finally, schedule a 50-hour re-tensioning check. New tracks stretch during the break-in period, and a tension that was correct on day one will likely be too loose by hour 50. A quick adjustment now prevents de-tracking and uneven wear down the road.
Still have questions about replacement intervals, tooling, or when to choose rubber versus steel? The next section covers the most common real-world questions head-on.
Can I replace just one track at a time?
Technically yes — practically, no. Replacing tracks in pairs ensures even wear and prevents undue stress on the machine’s final drive motors. Mismatched tracks create uneven tension and traction, which can strain your undercarriage and throw off the machine’s tracking. Always swap both sides simultaneously.
How long do rubber tracks typically last?
Expect 1,200 to 1,600 operating hours under normal conditions. Rocky, abrasive terrain cuts that lifespan significantly shorter, while soft soil applications can push past the upper range. Regular tension checks and cleaning extend service life considerably.
What tools do I need for a DIY swap?
The core toolkit includes a pry bar, grease gun, socket set, and jack stands or crib blocks. A rubber mallet and track pick also help. Check out this hands-on DIY walkthrough for a practical visual reference.
How do I know if I need steel or rubber tracks?
Steel tracks suit rocky terrain, steep grades, and heavy demolition work. Rubber tracks excel on finished surfaces, soft ground, and urban job sites where surface damage matters. Match the track material to your dominant working conditions — not just machine size.