Telephone/WhatsApp:+86 156 2656 0610

Telephone/WhatsApp:+86 156 2656 0610
Email:info@seekmach.com



A practical mini excavator maintenance checklist begins before the engine starts: park on firm level ground, lower the bucket and blade, relieve stored pressure as the manual directs, remove the key, and inspect the machine in the same order every day. Consistent checks expose small leaks, loose hardware, damaged hoses, packed debris, and track problems before they become downtime.
Intervals vary by model, engine, attachment, climate, and duty cycle. The operation and maintenance manual for the exact serial number is therefore the controlling source. This guide helps an owner organize that manual into daily, weekly, hour-based, and seasonal routines without inventing universal fluid types or service intervals.
Recent operator discussions still circle around the same preventable failures: neglected grease points, incorrect track tension, dirty coolers, water in fuel, and hoses rubbed through by poor routing. The aim is not to replace a trained technician; it is to make inspection evidence clear enough that the right maintenance happens on time.
Start at the bucket and move around the machine in one direction: coupler, linkage, boom, stick, cylinders, right track, engine compartment, counterweight, left track, blade, cab, and controls. A fixed route reduces the chance of skipping a pin, hose, guard, or fluid spot.
Record hour-meter reading, fluid added, grease completed, defects, photos, and who inspected the machine. A simple log shows whether oil consumption, track adjustment, or hose abrasion is accelerating and gives the service technician better evidence than a memory of when the noise started.
For a related specification or ownership decision, continue with this practical SeekMach resource: mini excavator category.
Isolation must address gravity, hydraulic pressure, heat, and unexpected movement. Never place any part of the body beneath unsupported equipment, and use the manufacturer procedure before opening a circuit. The broader hazardous-energy principle is explained in OSHA lockout/tagout guidance.
Lower attachments fully, choose level ground, engage the parking system, let hot components cool, and follow the manual for hydraulic pressure release and isolation. Never work beneath an unsupported raised boom, blade, or tilted cab; use approved support procedures where service access requires them.
Clean enough mud to see the components, but do not force water into electrical connectors, bearings, breathers, or the radiator stack. Wear eye protection and gloves, and treat pressurized hydraulic leaks as an injection hazard rather than searching with a bare hand.
For a related specification or ownership decision, continue with this practical SeekMach resource: rubber-track size guide.
High-pressure injection injuries can look small while causing deep tissue damage. Never search with a bare hand, and treat suspected injection as an emergency requiring immediate specialist assessment. Review the hazard description from OSHA hydraulic equipment guidance.
Check engine oil, coolant, hydraulic level, fuel, and any specified final-drive levels at the conditions stated in the manual. The correct temperature, machine position, and attachment position matter. Mixing an unapproved fluid to make a sight glass look full can create a more expensive problem.
Trace every fresh stain upward to its source. Inspect hose covers, crimps, fittings, cylinder rods, seals, pump area, travel motors, and the ground beneath the machine. Photograph seepage, clean the area safely, and monitor it; shut down for active leaks, damaged pressure lines, or unexplained fluid loss.
For a related specification or ownership decision, continue with this practical SeekMach resource: track tension and wear guide.
Fuel and oil should be transferred, stored, and cleaned up without allowing contamination into drains, soil, or water. Sites handling oil can use the prevention concepts described by US EPA spill prevention guidance.
Drain the fuel-water separator only by the manual procedure and dispose of contaminated fluid correctly. Keep the fill area clean, use appropriate storage, and avoid topping up from an open dirty container. Water and fine dirt can damage modern fuel systems long before the engine visibly loses power.
Inspect the air-cleaner restriction indicator, intake ducting, clamps, and pre-cleaner. Do not replace or blow out an element merely because the outer housing is dusty; follow the specified method, since poor cleaning can tear media or drive dirt into the clean side.
For a related specification or ownership decision, continue with this practical SeekMach resource: mini excavator size chart.
Remove packed grass, seed, dust, and oily debris from screens and cooler faces using the method allowed by the manual. Clean from the correct direction and protect delicate fins. A machine that runs well in a cool morning may overheat during continuous auxiliary-hydraulic work after the cooler stack loads with debris.
Check coolant level only under safe temperature conditions, inspect caps and hoses, and investigate repeated top-ups. Watch the display during work and stop for warnings. Continuing to operate through a temperature alarm can turn a cleaning problem into engine or hydraulic damage.
For a related specification or ownership decision, continue with this practical SeekMach resource: beginner operating guide.
This maintenance walkthrough is most useful when viewed beside the exact operator manual.
Notice the inspection sequence and the access points, then adapt the route to the machine model in front of you.
Do not copy a fluid, interval, lifting point, or pressure value from a different machine simply because the layout looks similar.
After the video, write the daily route on a one-page form and place the hour-based schedule in the service calendar.
Assign defects a clear status: safe to monitor, schedule repair, or remove from service.
Photographs of wear and leakage taken from the same angle make trends easier to judge over several weeks.
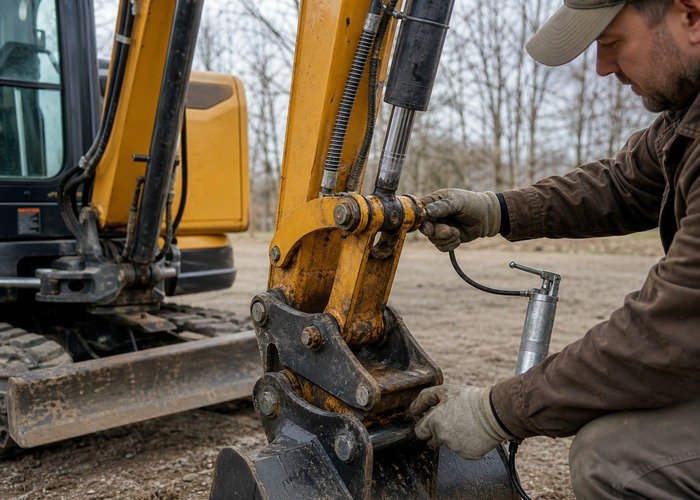
Grease frequency changes with water, abrasive soil, breaker use, and repeated articulation. Wipe fittings before connecting the gun so grit is not pushed into the joint. Observe whether fresh grease reaches the intended clearance and note fittings that refuse grease or purge rusty water.
Include boom, stick, bucket linkage, blade pivots, swing points, coupler, and attachment-specific fittings. Excess grease should be managed rather than left to collect abrasive dirt. A pin that keeps running dry needs diagnosis; simply pumping harder can damage the fitting or seal path.
For a related specification or ownership decision, continue with this practical SeekMach resource: equipment application pages.
Inspect hoses through the full visible routing for abrasion, cracked cover, exposed reinforcement, sharp bends, loose clamps, heat damage, and contact marks. Confirm that attachment hoses cannot stretch, pinch, or rub at full curl, dump, boom offset, and swing positions.
Keep quick couplers clean and capped, relieve pressure by the specified method, and never hammer a connection together. Inspect cylinder rods for scoring, rust, or impact and protect them from welding spatter and debris. A small damaged rod surface can quickly wear a seal.
Imported used machinery may also require detailed cleaning of tracks, frames, rollers, and hidden cavities to meet biosecurity rules. A component-by-component example is provided in the Australian government mini excavator cleaning checklist.
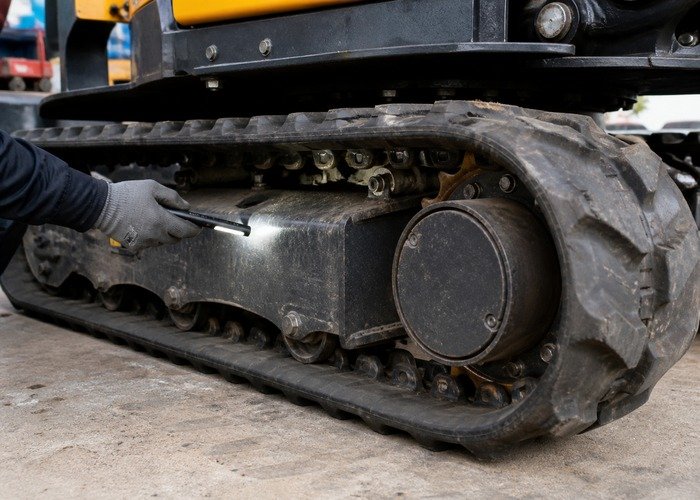
Track tension must be measured by the exact manual method because specified sag, lifting point, and temperature vary. Too tight increases load on rollers, idlers, sprockets, bearings, and the track; too loose raises derailment risk, especially during side turns and debris-packed work.
Clean around rollers, sprockets, idlers, and track frames. Look for cuts, missing tread, exposed cords, uneven wear, leaking rollers, loose hardware, hooked sprocket teeth, and rocks trapped inside the frame. Compare both sides; asymmetry often reveals alignment, operating, or component problems.
Inspection must include separation from people, stable ground, clear communication, and attachment security before motion. General construction-equipment controls and operator responsibilities are summarized by OSHA heavy equipment guidance.
Inspect bucket teeth, adapters, cutting edge, side cutters, pins, retainers, welds, and coupler locking engagement. Replace missing hardware before a tooth or pin becomes a projectile or disappears into the work. Verify the attachment is supported before approaching the coupler.
Powered attachments add their own gearbox oil, hoses, fasteners, wear parts, guarding, and grease schedule. Keep each attachment manual with the machine records and include attachment hours where possible; the excavator hour meter does not show how intensely a breaker or auger was used.
Maintenance work around running equipment and impact tools can create harmful noise even when the operator exposure during digging seems acceptable. Plan hearing protection and exposure controls using CDC/NIOSH occupational noise guidance.
Transfer the manual service table into a calendar that includes 50-, 100-, 250-, 500-, or other model-specific tasks without assuming those example intervals apply universally. Order filters, seals, fluids, and sampling containers before the hour arrives, then record part numbers and quantities actually used.
Use specified filters and fluids, clean around openings, label samples, and keep waste streams separate. If warranty or emissions systems require authorized work, schedule it early. A planned service window is cheaper than discovering at the deadline that the correct filter is several weeks away.
Before storage, clean corrosive material, fuel and protect the machine as the manual directs, grease exposed joints, inspect battery condition, protect cylinder rods, and park where tracks are not standing in water or aggressive chemicals. Do not improvise fuel or battery procedures.
On return, inspect nests, wiring, fluid leaks, tire or track condition, emergency equipment, alarms, and attachments before starting. Warm the machine gradually, cycle functions without load, and recheck levels and leaks. The first job after storage should not be the first inspection.
Turn the walkaround into a form that follows the machine physically. Each line should offer pass, monitor, repair before next shift, or remove from service, with room for a photo. A vague check mark cannot distinguish an old dry stain from an active leak. Clear status language identifies who must act and what evidence closes the defect.
Photograph the same four corners after cleaning and repeat close-ups of known wear points. Consistent framing makes track damage, hose rubbing, cylinder seepage, loose guards, and tooth wear easier to compare. Store images by date and hour reading. This record matters when several operators share the excavator and no one sees every change.
Build an undercarriage page with left and right columns. Record manual-method track sag, rubber cuts, cords, roller leakage, idler and sprocket condition, debris, fasteners, and travel noise. Compare sides rather than evaluating each alone. Repeated one-sided wear can reveal work patterns, turning technique, alignment, damaged parts, or a route loading one side.
Add a hose map for boom, stick, offset, blade, travel, and attachment circuits visible without disassembly. Mark clamps, sleeves, bends, and contact zones. After changing an attachment, cycle functions safely and recheck routing. A hose can look correct with the bucket flat but tighten at full curl or rub when the boom offsets.
Treat grease as an inspection event. Clean the fitting, observe the pin and bushing, note movement or noise, apply specified grease, and confirm normal acceptance. A blocked fitting, displaced seal, rusty purge, or joint consuming unusual grease deserves investigation. Counting gun strokes can hide a fitting that delivered nothing to the working surface.
Create a fluid control sheet listing approved specification, fill reference, container identity, opening date, clean transfer equipment, and waste route. Keep funnels separated and protect supplies from dust and water. If a level repeatedly falls, find the cause instead of normalizing top-ups. A trend is more useful than one reading after failure becomes obvious.
Before planned service, assemble serial-number-correct parts, tools, torque information, safety supports, spill materials, sample bottles, and labels. Decide which tasks need a qualified technician. After service, repeat the walkaround, check leaks, verify warnings and functions, and document changes. Installation alone does not complete verification.
Review the log monthly even before a major interval. Look for repeated overheating, track adjustment, loose hardware, battery weakness, abnormal fluid use, or the same hose needing protection. Patterns often identify an operating condition, attachment mismatch, cleaning gap, or emerging component problem. Acting on the pattern turns records into maintenance.
Set a short weekly review between the operator and the person responsible for service. Compare the defect log with hours, attachments, ground conditions, and upcoming work. Decide which items can be monitored with a measurement, which need parts ordered, and which remove the machine from service. Close every repair with a second inspection and a dated note. This rhythm prevents small observations from living indefinitely in a notebook, and it gives the next operator a clear starting condition rather than asking them to rediscover the same leak, loose fastener, or track problem.
Use the exact manual and attachment requirements. Water, abrasive material, breakers, and frequent articulation can shorten the interval, so a universal number is not reliable.
No. Both excessive and insufficient tension cause problems. Measure sag and adjust only by the model-specific method and safety procedure.
Never. High-pressure fluid can penetrate skin. Shut down, relieve pressure as directed, use safe inspection methods, and obtain urgent medical care for suspected injection injury.
A loaded cooler, high ambient temperature, sustained hydraulic demand, low fluid, fan or belt problems, or airflow obstruction may appear only after heat accumulates. Stop on warnings and diagnose the cause.
Hours, date, fluids, filters and parts, grease, defects, photos, repairs, samples, attachment use, and technician notes create a useful maintenance history and support warranty or resale discussions.
A mini excavator maintenance checklist works when it is specific to the serial number, quick enough to use, and detailed enough to trigger action. Walk the same route, measure rather than guess, record changes, and stop small defects before they become unsafe failures or lost workdays.
Reduce downtime with this mini excavator parts and downtime planning.
A maintenance walkaround should now include a repeatable check for movement between the upper structure and undercarriage. A new clunk during swing reversal, visible rocking, fretting around bearing bolts, or contaminated ring-gear grease is a reason to stop guessing and measure. Do not stand between the structures or beneath a raised attachment.
First separate boom, bucket, coupler, and swing-drive backlash from vertical bearing movement. Then use the model-specific service method and a rigid dial-indicator setup. Record upper-structure position, attachment position, blade position, machine hours, and three repeatable readings. Our new mini excavator slew-ring play inspection guide explains the complete check and repair decision.
No. Correct lubrication reduces wear but cannot restore worn races, rolling elements, loose fasteners, or a damaged mounting face.
Add a repeatable boom, stick, and bucket drift record to routine maintenance. Use the exact service-manual linkage position, hydraulic temperature, attachment, measurement points, and time interval. Inspect rods, glands, fittings, hoses, pins, and bushings first, then compare drift with cycle time and diagnostic codes.
The new mini excavator cylinder drift guide explains why a moving attachment can result from a cylinder, main control valve, port relief, holding valve, hose, or external leak rather than piston seals alone.
| Evidence | Действие |
|---|---|
| Visible rod-gland leak | Inspect rod and seal condition |
| Drift increases hot | Repeat at specification and isolate leakage path |
| Several functions drift | Inspect valve, oil, temperature, and contamination |
No. Lower equipment or use the manufacturer-approved support. Never work beneath a load held only by hydraulics.