Telephone/WhatsApp:+86 156 2656 0610

Telephone/WhatsApp:+86 156 2656 0610
Email:info@seekmach.com

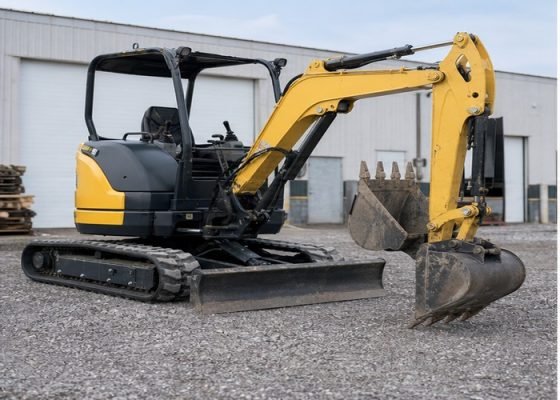
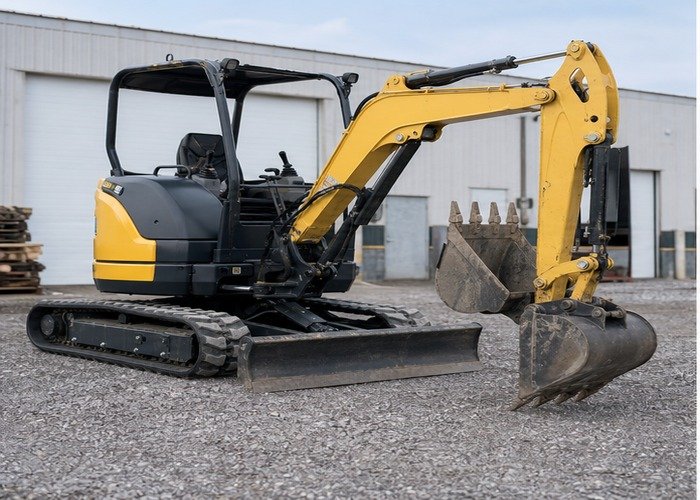
Mini Excavator Track Tension Guide: Sag, Grease Adjuster, Rollers, and Travel Diagnosis should be answered from the worksite backward. The useful question is not the largest machine you can justify; it is which setup completes the repeated job with control, service margin, and a clear safety routine.
This guide focuses on diagnosing and setting mini excavator rubber-track tension by following the machine manual, measuring sag in the specified position, inspecting rollers and sprockets, using the grease adjuster cautiously, and separating tension faults from undercarriage wear. It is written for buyers, owners, and operators who need a practical decision before money, labor, or a workday is committed.
Before comparing models, list the tasks that happen every week and the tasks that happen only once or twice a year. Then confirm which pages on the current site match the decision, starting with mini excavator category and the broader excavator application solutions.
Describe the travel symptom before adjusting is a field decision, not a catalog shortcut. For mini excavator track tension, start by writing the job, the surface, the expected finish, the operator experience, and the stop conditions before comparing specifications.
Check the machine manual and attachment manual together. A excavator that looks adequate on one number can still be a poor fit when ballast, hydraulic flow, PTO load, cooling, transport width, or maintenance access is considered. SeekMach’s SeekMach product overview can help compare related product paths without treating any one specification as the whole answer.
Use a short work-cycle test when possible: inspect the site, set up the machine, complete one representative pass, turn, travel, clean up, and record what slowed the work. That record is more useful than a best-case demonstration. The OSHA trenching and excavation guidance is a useful outside reference for the safety or operating context behind this check.
A common mistake is solving the easy part of the job and ignoring the repeat work that follows: cleanup, storage, inspections, refueling or charging, repairs, transport, and the next hookup.
For a buying or setup decision, write three limits beside the specification: the condition where the machine works comfortably, the condition where it works slowly but acceptably, and the condition where the job should stop. This prevents a demonstration on easy ground from becoming an unsafe rule for wet soil, slopes, poor visibility, heavy material, or an attachment that changes balance.
Operators should also decide who is responsible for inspection before the next shift. A clean machine, known fluid level, visible pins, readable labels, sound guards, and a written note about any abnormal heat or noise make the next decision easier. Small defects are cheaper to handle before they become part of the normal routine.
Clean the undercarriage and inspect for damage is a field decision, not a catalog shortcut. For mini excavator track tension, start by writing the job, the surface, the expected finish, the operator experience, and the stop conditions before comparing specifications.
Check the machine manual and attachment manual together. A excavator that looks adequate on one number can still be a poor fit when ballast, hydraulic flow, PTO load, cooling, transport width, or maintenance access is considered. SeekMach’s mini excavator size chart can help compare related product paths without treating any one specification as the whole answer.
Use a short work-cycle test when possible: inspect the site, set up the machine, complete one representative pass, turn, travel, clean up, and record what slowed the work. That record is more useful than a best-case demonstration. The Call 811 before digging is a useful outside reference for the safety or operating context behind this check.
When the result is marginal, change one variable at a time. Reduce the load, alter the route, choose a different attachment, wait for better ground conditions, or step up to a better matched machine.
For a buying or setup decision, write three limits beside the specification: the condition where the machine works comfortably, the condition where it works slowly but acceptably, and the condition where the job should stop. This prevents a demonstration on easy ground from becoming an unsafe rule for wet soil, slopes, poor visibility, heavy material, or an attachment that changes balance.
Operators should also decide who is responsible for inspection before the next shift. A clean machine, known fluid level, visible pins, readable labels, sound guards, and a written note about any abnormal heat or noise make the next decision easier. Small defects are cheaper to handle before they become part of the normal routine.
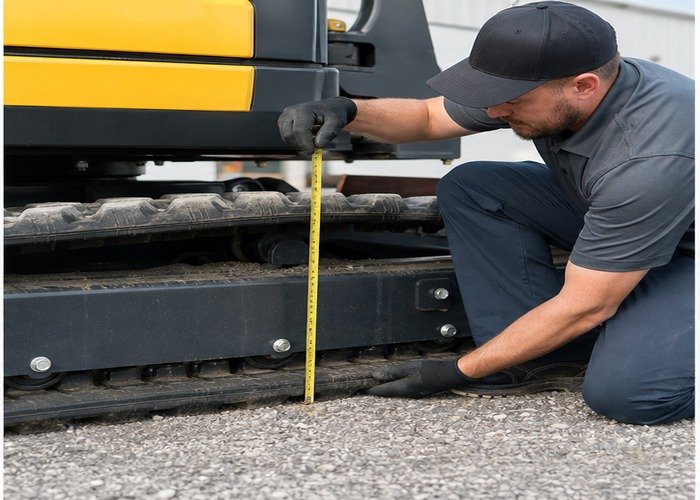
Find the manual measurement position and sag range is a field decision, not a catalog shortcut. For mini excavator track tension, start by writing the job, the surface, the expected finish, the operator experience, and the stop conditions before comparing specifications.
Check the machine manual and attachment manual together. A excavator that looks adequate on one number can still be a poor fit when ballast, hydraulic flow, PTO load, cooling, transport width, or maintenance access is considered.
Use a short work-cycle test when possible: inspect the site, set up the machine, complete one representative pass, turn, travel, clean up, and record what slowed the work. That record is more useful than a best-case demonstration. The NIOSH construction equipment visibility diagrams is a useful outside reference for the safety or operating context behind this check.
A common mistake is solving the easy part of the job and ignoring the repeat work that follows: cleanup, storage, inspections, refueling or charging, repairs, transport, and the next hookup.
For a buying or setup decision, write three limits beside the specification: the condition where the machine works comfortably, the condition where it works slowly but acceptably, and the condition where the job should stop. This prevents a demonstration on easy ground from becoming an unsafe rule for wet soil, slopes, poor visibility, heavy material, or an attachment that changes balance.
Operators should also decide who is responsible for inspection before the next shift. A clean machine, known fluid level, visible pins, readable labels, sound guards, and a written note about any abnormal heat or noise make the next decision easier. Small defects are cheaper to handle before they become part of the normal routine.
Raise and support the track only as specified is a field decision, not a catalog shortcut. For mini excavator track tension, start by writing the job, the surface, the expected finish, the operator experience, and the stop conditions before comparing specifications.
Check the machine manual and attachment manual together. A excavator that looks adequate on one number can still be a poor fit when ballast, hydraulic flow, PTO load, cooling, transport width, or maintenance access is considered. SeekMach’s mini excavator attachments guide can help compare related product paths without treating any one specification as the whole answer.
Use a short work-cycle test when possible: inspect the site, set up the machine, complete one representative pass, turn, travel, clean up, and record what slowed the work. That record is more useful than a best-case demonstration.
When the result is marginal, change one variable at a time. Reduce the load, alter the route, choose a different attachment, wait for better ground conditions, or step up to a better matched machine.
For a buying or setup decision, write three limits beside the specification: the condition where the machine works comfortably, the condition where it works slowly but acceptably, and the condition where the job should stop. This prevents a demonstration on easy ground from becoming an unsafe rule for wet soil, slopes, poor visibility, heavy material, or an attachment that changes balance.
Operators should also decide who is responsible for inspection before the next shift. A clean machine, known fluid level, visible pins, readable labels, sound guards, and a written note about any abnormal heat or noise make the next decision easier. Small defects are cheaper to handle before they become part of the normal routine.
Add grease slowly and measure again is a field decision, not a catalog shortcut. For mini excavator track tension, start by writing the job, the surface, the expected finish, the operator experience, and the stop conditions before comparing specifications.
Check the machine manual and attachment manual together. A excavator that looks adequate on one number can still be a poor fit when ballast, hydraulic flow, PTO load, cooling, transport width, or maintenance access is considered.
Use a short work-cycle test when possible: inspect the site, set up the machine, complete one representative pass, turn, travel, clean up, and record what slowed the work. That record is more useful than a best-case demonstration. The OSHA heavy equipment rules is a useful outside reference for the safety or operating context behind this check.
A common mistake is solving the easy part of the job and ignoring the repeat work that follows: cleanup, storage, inspections, refueling or charging, repairs, transport, and the next hookup.
For a buying or setup decision, write three limits beside the specification: the condition where the machine works comfortably, the condition where it works slowly but acceptably, and the condition where the job should stop. This prevents a demonstration on easy ground from becoming an unsafe rule for wet soil, slopes, poor visibility, heavy material, or an attachment that changes balance.
Operators should also decide who is responsible for inspection before the next shift. A clean machine, known fluid level, visible pins, readable labels, sound guards, and a written note about any abnormal heat or noise make the next decision easier. Small defects are cheaper to handle before they become part of the normal routine.
Release pressure without entering the hazard zone is a field decision, not a catalog shortcut. For mini excavator track tension, start by writing the job, the surface, the expected finish, the operator experience, and the stop conditions before comparing specifications.
Check the machine manual and attachment manual together. A excavator that looks adequate on one number can still be a poor fit when ballast, hydraulic flow, PTO load, cooling, transport width, or maintenance access is considered. SeekMach’s machinery application planning can help compare related product paths without treating any one specification as the whole answer.
Use a short work-cycle test when possible: inspect the site, set up the machine, complete one representative pass, turn, travel, clean up, and record what slowed the work. That record is more useful than a best-case demonstration. The NIOSH hydraulic safety publication is a useful outside reference for the safety or operating context behind this check.
When the result is marginal, change one variable at a time. Reduce the load, alter the route, choose a different attachment, wait for better ground conditions, or step up to a better matched machine.
For a buying or setup decision, write three limits beside the specification: the condition where the machine works comfortably, the condition where it works slowly but acceptably, and the condition where the job should stop. This prevents a demonstration on easy ground from becoming an unsafe rule for wet soil, slopes, poor visibility, heavy material, or an attachment that changes balance.
Operators should also decide who is responsible for inspection before the next shift. A clean machine, known fluid level, visible pins, readable labels, sound guards, and a written note about any abnormal heat or noise make the next decision easier. Small defects are cheaper to handle before they become part of the normal routine.
Inspect rollers idlers sprockets and track guides is a field decision, not a catalog shortcut. For mini excavator track tension, start by writing the job, the surface, the expected finish, the operator experience, and the stop conditions before comparing specifications.
Check the machine manual and attachment manual together. A excavator that looks adequate on one number can still be a poor fit when ballast, hydraulic flow, PTO load, cooling, transport width, or maintenance access is considered.
Use a short work-cycle test when possible: inspect the site, set up the machine, complete one representative pass, turn, travel, clean up, and record what slowed the work. That record is more useful than a best-case demonstration.
A common mistake is solving the easy part of the job and ignoring the repeat work that follows: cleanup, storage, inspections, refueling or charging, repairs, transport, and the next hookup.
For a buying or setup decision, write three limits beside the specification: the condition where the machine works comfortably, the condition where it works slowly but acceptably, and the condition where the job should stop. This prevents a demonstration on easy ground from becoming an unsafe rule for wet soil, slopes, poor visibility, heavy material, or an attachment that changes balance.
Operators should also decide who is responsible for inspection before the next shift. A clean machine, known fluid level, visible pins, readable labels, sound guards, and a written note about any abnormal heat or noise make the next decision easier. Small defects are cheaper to handle before they become part of the normal routine.
Complete a level-ground travel and turn test is a field decision, not a catalog shortcut. For mini excavator track tension, start by writing the job, the surface, the expected finish, the operator experience, and the stop conditions before comparing specifications.
Check the machine manual and attachment manual together. A excavator that looks adequate on one number can still be a poor fit when ballast, hydraulic flow, PTO load, cooling, transport width, or maintenance access is considered.
Use a short work-cycle test when possible: inspect the site, set up the machine, complete one representative pass, turn, travel, clean up, and record what slowed the work. That record is more useful than a best-case demonstration.
When the result is marginal, change one variable at a time. Reduce the load, alter the route, choose a different attachment, wait for better ground conditions, or step up to a better matched machine.
For a buying or setup decision, write three limits beside the specification: the condition where the machine works comfortably, the condition where it works slowly but acceptably, and the condition where the job should stop. This prevents a demonstration on easy ground from becoming an unsafe rule for wet soil, slopes, poor visibility, heavy material, or an attachment that changes balance.
Operators should also decide who is responsible for inspection before the next shift. A clean machine, known fluid level, visible pins, readable labels, sound guards, and a written note about any abnormal heat or noise make the next decision easier. Small defects are cheaper to handle before they become part of the normal routine.
No. Size matters, but the final choice also depends on surface, attachment load, operator skill, maintenance access, transport, and how much reserve the job needs.
Usually not without checking frequency. A rare peak task may be better rented, contracted, or handled with a different attachment while the owned machine fits recurring work.
Test the actual work cycle: setup, first pass, turns, travel, finish quality, cleanup, shutdown, and storage. Watch heat, traction, visibility, noise, and control response.
The best answer for mini excavator track tension is the one that completes the real job with margin, predictable handling, and a maintenance routine the owner will actually follow.
Use the validated public video as one visual reference for the topic: related YouTube demonstration. Then compare the machine against the site, the attachment, and the operator rather than relying on a single headline specification.
If two options are close, choose the one with clearer service support, safer attachment fit, and a calmer work cycle. That decision usually pays back more reliably than a bigger number on paper.
If a mini excavator still pulls after the undercarriage is clean and both tracks meet the model specification, measure the symptom on level ground. Record forward and reverse deviation, travel time, oil temperature, engine rpm and travel mode. A side that remains slow in both directions needs a comparison of control command, swivel leakage, work-port pressure, case drain, brake release and final-drive drag.
Use the new mini excavator pulls-to-one-side diagnostic guide to move from track checks to pressure and motor evidence without parts swapping.
| Finding | Next action |
|---|---|
| One track binds with power isolated | Inspect rollers, idler, brake and final drive |
| Equal free rotation but unequal pilot command | Inspect pedals, linkage, sensors and pilot circuit |
| Correct command but high case drain | Use the model motor leakage limit |
No. Temperature is supporting evidence; track tension, bearing drag, brake release and internal leakage can all create heat. Compare measurements under the same conditions.
Track sag alone does not explain every derailment. With the machine parked and attachment lowered, inspect the idler travel, grease-adjuster area, sprocket teeth, roller alignment, packed material and track damage using the model procedure. The mini excavator track-off guide helps separate tension, alignment and undercarriage observations before any recovery attempt.
Do not place hands between the track and sprocket or release grease without the exact manufacturer method. A damaged adjuster, broken roller or repeatedly derailed track needs qualified service before travel resumes.
Record track sag, roller condition and debris before travel. Use the track-off prevention guide when alignment changes.