Telephone/WhatsApp:+86 156 2656 0610
Telephone/WhatsApp:+86 156 2656 0610
Email:info@seekmach.com

Mini Excavator Hydraulic Coupler Won’t Connect: Relieve Residual Pressure Safely gives buyers and operators a structured way to verify condition, fit, and safety before money or machinery moves.
Continue through the SeekMach equipment range, compare the tractor range, review compact excavators, see caricatori skid steer, and browse lawn mowers.
Start with records, ratings, and the exact machine: A hydraulic quick coupler that will not connect often has trapped pressure on one side, contamination on the faces, a damaged seal, or mismatched coupler halves. Verify that the attachment is supported securely, shut the engine down, lower implements, and move the controls through the manufacturer’s prescribed relief sequence before touching the connection.
Start with records, ratings, and the exact machine: Never force the halves together with tools and never strike, loosen, or crack a pressurized fitting. Hydraulic injection injuries can look small while causing deep tissue damage. Keep hands away from suspected pinhole leaks, use cardboard or another approved method for leak detection, and seek immediate medical care after any suspected injection.
Start with records, ratings, and the exact machine: Sun-warmed attachments can build residual pressure even after they were disconnected correctly. Move the attachment to shade when practical and follow its approved pressure-relief provision. If no safe provision exists, stop and ask a qualified technician; improvising at the fitting can release oil suddenly and contaminate the connection.
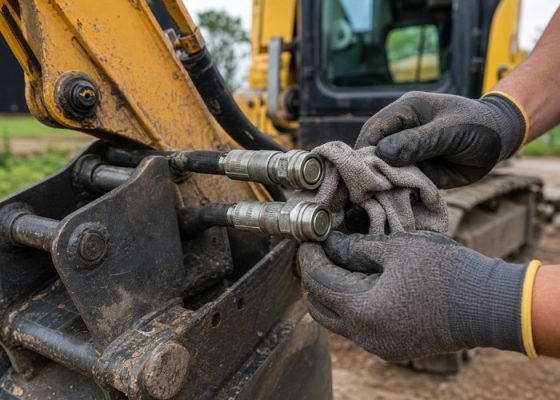
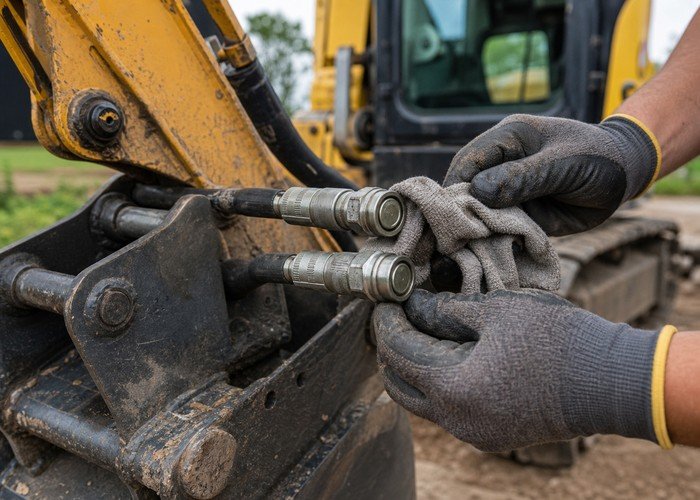
Start with records, ratings, and the exact machine: Clean both flat faces with lint-free material, inspect the locking sleeve and balls, and compare the size, body series, and flow direction. Similar-looking couplers are not automatically compatible. A swollen O-ring, nicked face, bent sleeve, or mixed series calls for the correct replacement rather than more force.
Start with records, ratings, and the exact machine: After connection, tug-test the locked sleeve, route hoses clear of pinch and abrasion points, start at low idle, and cycle the attachment slowly. Watch for seepage, heat, chatter, or hose movement. Depressurize and correct any fault before returning the machine to normal work.
Safety-first walk-around before operation: A hydraulic quick coupler that will not connect often has trapped pressure on one side, contamination on the faces, a damaged seal, or mismatched coupler halves. Verify that the attachment is supported securely, shut the engine down, lower implements, and move the controls through the manufacturer’s prescribed relief sequence before touching the connection.
Safety-first walk-around before operation: Never force the halves together with tools and never strike, loosen, or crack a pressurized fitting. Hydraulic injection injuries can look small while causing deep tissue damage. Keep hands away from suspected pinhole leaks, use cardboard or another approved method for leak detection, and seek immediate medical care after any suspected injection.
Safety-first walk-around before operation: Sun-warmed attachments can build residual pressure even after they were disconnected correctly. Move the attachment to shade when practical and follow its approved pressure-relief provision. If no safe provision exists, stop and ask a qualified technician; improvising at the fitting can release oil suddenly and contaminate the connection.
Safety-first walk-around before operation: Clean both flat faces with lint-free material, inspect the locking sleeve and balls, and compare the size, body series, and flow direction. Similar-looking couplers are not automatically compatible. A swollen O-ring, nicked face, bent sleeve, or mixed series calls for the correct replacement rather than more force.
Safety-first walk-around before operation: After connection, tug-test the locked sleeve, route hoses clear of pinch and abrasion points, start at low idle, and cycle the attachment slowly. Watch for seepage, heat, chatter, or hose movement. Depressurize and correct any fault before returning the machine to normal work.
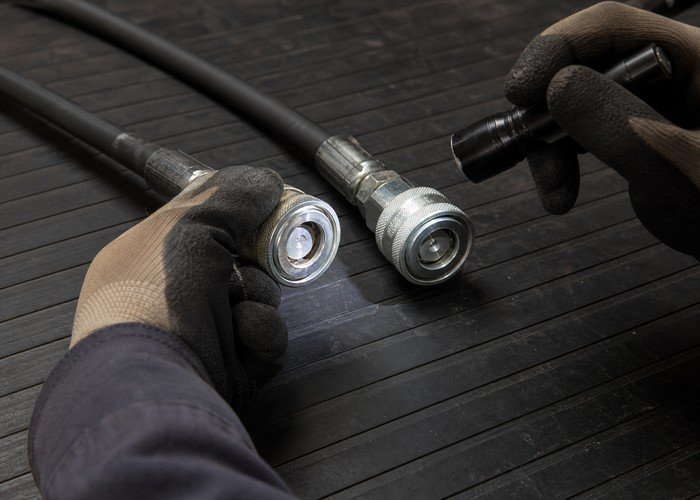
Engine, fluids, cooling, and leak checks: A hydraulic quick coupler that will not connect often has trapped pressure on one side, contamination on the faces, a damaged seal, or mismatched coupler halves. Verify that the attachment is supported securely, shut the engine down, lower implements, and move the controls through the manufacturer’s prescribed relief sequence before touching the connection.
Engine, fluids, cooling, and leak checks: Never force the halves together with tools and never strike, loosen, or crack a pressurized fitting. Hydraulic injection injuries can look small while causing deep tissue damage. Keep hands away from suspected pinhole leaks, use cardboard or another approved method for leak detection, and seek immediate medical care after any suspected injection.
Engine, fluids, cooling, and leak checks: Sun-warmed attachments can build residual pressure even after they were disconnected correctly. Move the attachment to shade when practical and follow its approved pressure-relief provision. If no safe provision exists, stop and ask a qualified technician; improvising at the fitting can release oil suddenly and contaminate the connection.
Engine, fluids, cooling, and leak checks: Clean both flat faces with lint-free material, inspect the locking sleeve and balls, and compare the size, body series, and flow direction. Similar-looking couplers are not automatically compatible. A swollen O-ring, nicked face, bent sleeve, or mixed series calls for the correct replacement rather than more force.
Engine, fluids, cooling, and leak checks: After connection, tug-test the locked sleeve, route hoses clear of pinch and abrasion points, start at low idle, and cycle the attachment slowly. Watch for seepage, heat, chatter, or hose movement. Depressurize and correct any fault before returning the machine to normal work.
Hydraulics, structure, and working components: A hydraulic quick coupler that will not connect often has trapped pressure on one side, contamination on the faces, a damaged seal, or mismatched coupler halves. Verify that the attachment is supported securely, shut the engine down, lower implements, and move the controls through the manufacturer’s prescribed relief sequence before touching the connection.
Hydraulics, structure, and working components: Never force the halves together with tools and never strike, loosen, or crack a pressurized fitting. Hydraulic injection injuries can look small while causing deep tissue damage. Keep hands away from suspected pinhole leaks, use cardboard or another approved method for leak detection, and seek immediate medical care after any suspected injection.
Hydraulics, structure, and working components: Sun-warmed attachments can build residual pressure even after they were disconnected correctly. Move the attachment to shade when practical and follow its approved pressure-relief provision. If no safe provision exists, stop and ask a qualified technician; improvising at the fitting can release oil suddenly and contaminate the connection.
Hydraulics, structure, and working components: Clean both flat faces with lint-free material, inspect the locking sleeve and balls, and compare the size, body series, and flow direction. Similar-looking couplers are not automatically compatible. A swollen O-ring, nicked face, bent sleeve, or mixed series calls for the correct replacement rather than more force.
Hydraulics, structure, and working components: After connection, tug-test the locked sleeve, route hoses clear of pinch and abrasion points, start at low idle, and cycle the attachment slowly. Watch for seepage, heat, chatter, or hose movement. Depressurize and correct any fault before returning the machine to normal work.
Functional test under realistic load: A hydraulic quick coupler that will not connect often has trapped pressure on one side, contamination on the faces, a damaged seal, or mismatched coupler halves. Verify that the attachment is supported securely, shut the engine down, lower implements, and move the controls through the manufacturer’s prescribed relief sequence before touching the connection.
Functional test under realistic load: Never force the halves together with tools and never strike, loosen, or crack a pressurized fitting. Hydraulic injection injuries can look small while causing deep tissue damage. Keep hands away from suspected pinhole leaks, use cardboard or another approved method for leak detection, and seek immediate medical care after any suspected injection.
Functional test under realistic load: Sun-warmed attachments can build residual pressure even after they were disconnected correctly. Move the attachment to shade when practical and follow its approved pressure-relief provision. If no safe provision exists, stop and ask a qualified technician; improvising at the fitting can release oil suddenly and contaminate the connection.
Functional test under realistic load: Clean both flat faces with lint-free material, inspect the locking sleeve and balls, and compare the size, body series, and flow direction. Similar-looking couplers are not automatically compatible. A swollen O-ring, nicked face, bent sleeve, or mixed series calls for the correct replacement rather than more force.
Functional test under realistic load: After connection, tug-test the locked sleeve, route hoses clear of pinch and abrasion points, start at low idle, and cycle the attachment slowly. Watch for seepage, heat, chatter, or hose movement. Depressurize and correct any fault before returning the machine to normal work.
Decision table: pass, negotiate, or stop: A hydraulic quick coupler that will not connect often has trapped pressure on one side, contamination on the faces, a damaged seal, or mismatched coupler halves. Verify that the attachment is supported securely, shut the engine down, lower implements, and move the controls through the manufacturer’s prescribed relief sequence before touching the connection.
Decision table: pass, negotiate, or stop: Never force the halves together with tools and never strike, loosen, or crack a pressurized fitting. Hydraulic injection injuries can look small while causing deep tissue damage. Keep hands away from suspected pinhole leaks, use cardboard or another approved method for leak detection, and seek immediate medical care after any suspected injection.
Decision table: pass, negotiate, or stop: Sun-warmed attachments can build residual pressure even after they were disconnected correctly. Move the attachment to shade when practical and follow its approved pressure-relief provision. If no safe provision exists, stop and ask a qualified technician; improvising at the fitting can release oil suddenly and contaminate the connection.
Decision table: pass, negotiate, or stop: Clean both flat faces with lint-free material, inspect the locking sleeve and balls, and compare the size, body series, and flow direction. Similar-looking couplers are not automatically compatible. A swollen O-ring, nicked face, bent sleeve, or mixed series calls for the correct replacement rather than more force.
Decision table: pass, negotiate, or stop: After connection, tug-test the locked sleeve, route hoses clear of pinch and abrasion points, start at low idle, and cycle the attachment slowly. Watch for seepage, heat, chatter, or hose movement. Depressurize and correct any fault before returning the machine to normal work.
Questions to ask the seller or operator: A hydraulic quick coupler that will not connect often has trapped pressure on one side, contamination on the faces, a damaged seal, or mismatched coupler halves. Verify that the attachment is supported securely, shut the engine down, lower implements, and move the controls through the manufacturer’s prescribed relief sequence before touching the connection.
Questions to ask the seller or operator: Never force the halves together with tools and never strike, loosen, or crack a pressurized fitting. Hydraulic injection injuries can look small while causing deep tissue damage. Keep hands away from suspected pinhole leaks, use cardboard or another approved method for leak detection, and seek immediate medical care after any suspected injection.
Questions to ask the seller or operator: Sun-warmed attachments can build residual pressure even after they were disconnected correctly. Move the attachment to shade when practical and follow its approved pressure-relief provision. If no safe provision exists, stop and ask a qualified technician; improvising at the fitting can release oil suddenly and contaminate the connection.
Questions to ask the seller or operator: Clean both flat faces with lint-free material, inspect the locking sleeve and balls, and compare the size, body series, and flow direction. Similar-looking couplers are not automatically compatible. A swollen O-ring, nicked face, bent sleeve, or mixed series calls for the correct replacement rather than more force.
Questions to ask the seller or operator: After connection, tug-test the locked sleeve, route hoses clear of pinch and abrasion points, start at low idle, and cycle the attachment slowly. Watch for seepage, heat, chatter, or hose movement. Depressurize and correct any fault before returning the machine to normal work.
A repeatable field checklist: A hydraulic quick coupler that will not connect often has trapped pressure on one side, contamination on the faces, a damaged seal, or mismatched coupler halves. Verify that the attachment is supported securely, shut the engine down, lower implements, and move the controls through the manufacturer’s prescribed relief sequence before touching the connection.
A repeatable field checklist: Never force the halves together with tools and never strike, loosen, or crack a pressurized fitting. Hydraulic injection injuries can look small while causing deep tissue damage. Keep hands away from suspected pinhole leaks, use cardboard or another approved method for leak detection, and seek immediate medical care after any suspected injection.
A repeatable field checklist: Sun-warmed attachments can build residual pressure even after they were disconnected correctly. Move the attachment to shade when practical and follow its approved pressure-relief provision. If no safe provision exists, stop and ask a qualified technician; improvising at the fitting can release oil suddenly and contaminate the connection.
A repeatable field checklist: Clean both flat faces with lint-free material, inspect the locking sleeve and balls, and compare the size, body series, and flow direction. Similar-looking couplers are not automatically compatible. A swollen O-ring, nicked face, bent sleeve, or mixed series calls for the correct replacement rather than more force.
A repeatable field checklist: After connection, tug-test the locked sleeve, route hoses clear of pinch and abrasion points, start at low idle, and cycle the attachment slowly. Watch for seepage, heat, chatter, or hose movement. Depressurize and correct any fault before returning the machine to normal work.
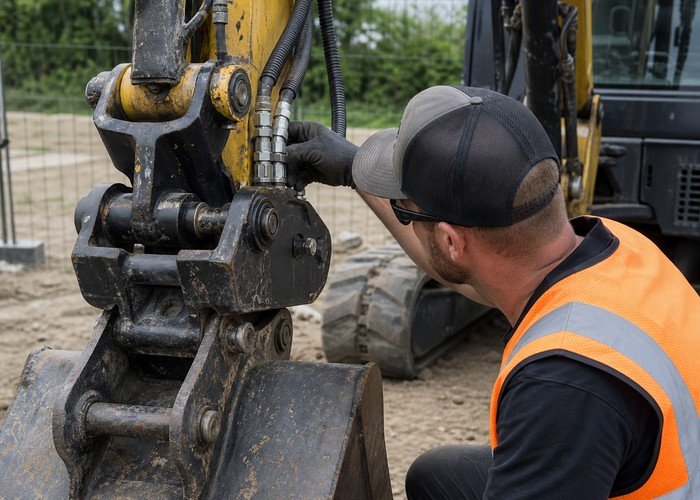
Common mistakes that create expensive surprises: A hydraulic quick coupler that will not connect often has trapped pressure on one side, contamination on the faces, a damaged seal, or mismatched coupler halves. Verify that the attachment is supported securely, shut the engine down, lower implements, and move the controls through the manufacturer’s prescribed relief sequence before touching the connection.
Common mistakes that create expensive surprises: Never force the halves together with tools and never strike, loosen, or crack a pressurized fitting. Hydraulic injection injuries can look small while causing deep tissue damage. Keep hands away from suspected pinhole leaks, use cardboard or another approved method for leak detection, and seek immediate medical care after any suspected injection.
Common mistakes that create expensive surprises: Sun-warmed attachments can build residual pressure even after they were disconnected correctly. Move the attachment to shade when practical and follow its approved pressure-relief provision. If no safe provision exists, stop and ask a qualified technician; improvising at the fitting can release oil suddenly and contaminate the connection.
Common mistakes that create expensive surprises: Clean both flat faces with lint-free material, inspect the locking sleeve and balls, and compare the size, body series, and flow direction. Similar-looking couplers are not automatically compatible. A swollen O-ring, nicked face, bent sleeve, or mixed series calls for the correct replacement rather than more force.
Common mistakes that create expensive surprises: After connection, tug-test the locked sleeve, route hoses clear of pinch and abrasion points, start at low idle, and cycle the attachment slowly. Watch for seepage, heat, chatter, or hose movement. Depressurize and correct any fault before returning the machine to normal work.
Final verification before transport or purchase: A hydraulic quick coupler that will not connect often has trapped pressure on one side, contamination on the faces, a damaged seal, or mismatched coupler halves. Verify that the attachment is supported securely, shut the engine down, lower implements, and move the controls through the manufacturer’s prescribed relief sequence before touching the connection.
Final verification before transport or purchase: Never force the halves together with tools and never strike, loosen, or crack a pressurized fitting. Hydraulic injection injuries can look small while causing deep tissue damage. Keep hands away from suspected pinhole leaks, use cardboard or another approved method for leak detection, and seek immediate medical care after any suspected injection.
Final verification before transport or purchase: Sun-warmed attachments can build residual pressure even after they were disconnected correctly. Move the attachment to shade when practical and follow its approved pressure-relief provision. If no safe provision exists, stop and ask a qualified technician; improvising at the fitting can release oil suddenly and contaminate the connection.
Final verification before transport or purchase: Clean both flat faces with lint-free material, inspect the locking sleeve and balls, and compare the size, body series, and flow direction. Similar-looking couplers are not automatically compatible. A swollen O-ring, nicked face, bent sleeve, or mixed series calls for the correct replacement rather than more force.
Final verification before transport or purchase: After connection, tug-test the locked sleeve, route hoses clear of pinch and abrasion points, start at low idle, and cycle the attachment slowly. Watch for seepage, heat, chatter, or hose movement. Depressurize and correct any fault before returning the machine to normal work.
No. Use this workflow to organize the inspection, then apply the exact limits and procedures in the model manual.
Use a qualified technician when records are incomplete, safety structures are altered, fluids are contaminated, structural cracks appear, or the functional test is inconsistent.
Record serial number, hours, cold-start condition, leaks, wear, measured settings, attachments, faults, photographs, and the person who performed the check.