Telephone/WhatsApp:+86 156 2656 0610
Telephone/WhatsApp:+86 156 2656 0610
Email:seekmach@gmail.com

The best trenching bucket is not automatically the narrowest one that fits the excavator. It must create enough finished width for the pipe, bedding, compaction method, worker access rules, and soil behavior while remaining compatible with the coupler, pins, hydraulic geometry, machine stability, and available breakout force.
This guide starts at the finished trench and works backward to bucket width. It covers narrow utility trenches, drainage runs, sticky clay, loose sand, roots, rock, depth control, spoil placement, and attachment checks. Review the SeekMach excavator category while building the job profile.
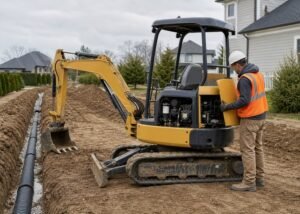
Call the local utility-locating service before digging and follow permits, protective-system requirements, and competent-person rules that apply to the site. A mini excavator saves hand labor; it does not make an unsupported trench safe to enter or remove the need to control spoil and machine setback.

Start with the installed system, not the bucket catalog. Pipe outside diameter, conduit spacing, bedding, haunching, compaction tools, inspection access, shoring, and local rules determine useful width. For related machine and attachment choices, use the SeekMach excavator solutions as a second reference. The OSHA trenching safety page provides useful independent background for this part of the check.
The practical way to evaluate this point is to write down the job, the operating condition, and the limit that would stop the work. Do not compare a single brochure number in isolation. Check the operator’s manual, attachment instructions, ground conditions, access width, transport plan, and the skill of the person who will use the machine. A combination that works only at its maximum rating leaves little room for wet material, a slope, wear, or an imperfect load.
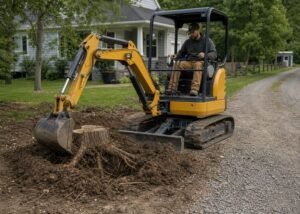
Consider this field example: A narrow bucket may cut an irrigation line cleanly in stable soil, while a drainage trench may need additional width for gravel envelope and compaction. The useful answer comes from the whole work cycle—setup, approach, productive pass, turning, travel, cleanup, and storage—not from one impressive moment. If the task cannot be repeated calmly with good visibility and control, change the setup, reduce the load, or choose a different machine.
A common mistake is choosing a bucket only because it removes less soil, then widening the trench by hand when bedding or pipe cannot be placed correctly. That shortcut usually transfers the problem somewhere else: extra passes, damaged turf, overloaded components, poor cut or trench quality, unsafe travel, or maintenance that is harder to perform. Record what happened during a test and use that evidence in the buying or service decision.
Bucket width is irrelevant if the attachment does not fit correctly. Pin diameter, pin-center distance, ear width, coupler type, bucket radius, tooth clearance, weight, and hydraulic geometry must match the machine. The compact excavator definition provides useful independent background for this part of the check.
The practical way to evaluate this point is to write down the job, the operating condition, and the limit that would stop the work. Do not compare a single brochure number in isolation. Check the operator’s manual, attachment instructions, ground conditions, access width, transport plan, and the skill of the person who will use the machine. A combination that works only at its maximum rating leaves little room for wet material, a slope, wear, or an imperfect load.
Consider this field example: A bucket may physically hang on a coupler but lose breakout force, contact the boom, or fail to lock through the full rotation. The useful answer comes from the whole work cycle—setup, approach, productive pass, turning, travel, cleanup, and storage—not from one impressive moment. If the task cannot be repeated calmly with good visibility and control, change the setup, reduce the load, or choose a different machine.
A common mistake is modifying ears, pins, stops, or coupler locks without engineered approval to make a nearly compatible bucket fit. That shortcut usually transfers the problem somewhere else: extra passes, damaged turf, overloaded components, poor cut or trench quality, unsafe travel, or maintenance that is harder to perform. Record what happened during a test and use that evidence in the buying or service decision.
Stable cohesive soil can hold a cut closer to bucket width; loose sand, saturated material, fill, and fractured ground can slough wider. Sticky clay can pack a narrow bucket and reduce discharge. For related machine and attachment choices, use the mini excavator size chart as a second reference. The NIOSH excavation safety information provides useful independent background for this part of the check.
The practical way to evaluate this point is to write down the job, the operating condition, and the limit that would stop the work. Do not compare a single brochure number in isolation. Check the operator’s manual, attachment instructions, ground conditions, access width, transport plan, and the skill of the person who will use the machine. A combination that works only at its maximum rating leaves little room for wet material, a slope, wear, or an imperfect load.
Consider this field example: A narrow bucket that works in dry topsoil may plug repeatedly in wet clay below, turning every dump into a slow shake that stresses the machine. The useful answer comes from the whole work cycle—setup, approach, productive pass, turning, travel, cleanup, and storage—not from one impressive moment. If the task cannot be repeated calmly with good visibility and control, change the setup, reduce the load, or choose a different machine.
A common mistake is assuming one soil sample represents the whole trench or using aggressive side loading to free packed material. That shortcut usually transfers the problem somewhere else: extra passes, damaged turf, overloaded components, poor cut or trench quality, unsafe travel, or maintenance that is harder to perform. Record what happened during a test and use that evidence in the buying or service decision.
Teeth penetrate compacted soil and roots but can disturb the trench bottom and catch utilities or fabric. A smooth edge leaves a cleaner floor in suitable material but may struggle in hard ground. The OSHA underground construction resources provides useful independent background for this part of the check.
The practical way to evaluate this point is to write down the job, the operating condition, and the limit that would stop the work. Do not compare a single brochure number in isolation. Check the operator’s manual, attachment instructions, ground conditions, access width, transport plan, and the skill of the person who will use the machine. A combination that works only at its maximum rating leaves little room for wet material, a slope, wear, or an imperfect load.
Consider this field example: A toothed bucket can open hard ground, followed by a smooth cleanup pass or bedding tool where the specification requires a uniform base. The useful answer comes from the whole work cycle—setup, approach, productive pass, turning, travel, cleanup, and storage—not from one impressive moment. If the task cannot be repeated calmly with good visibility and control, change the setup, reduce the load, or choose a different machine.
A common mistake is continuing with one missing tooth, which changes loading and can damage the adapter or leave an irregular trench. That shortcut usually transfers the problem somewhere else: extra passes, damaged turf, overloaded components, poor cut or trench quality, unsafe travel, or maintenance that is harder to perform. Record what happened during a test and use that evidence in the buying or service decision.
Maximum dig depth on a specification sheet is not the comfortable production depth. Near maximum reach, digging force, visibility, spoil placement, and control can deteriorate. For related machine and attachment choices, use the mini excavator operating guide as a second reference. The OSHA excavation standard provides useful independent background for this part of the check.
The practical way to evaluate this point is to write down the job, the operating condition, and the limit that would stop the work. Do not compare a single brochure number in isolation. Check the operator’s manual, attachment instructions, ground conditions, access width, transport plan, and the skill of the person who will use the machine. A combination that works only at its maximum rating leaves little room for wet material, a slope, wear, or an imperfect load.
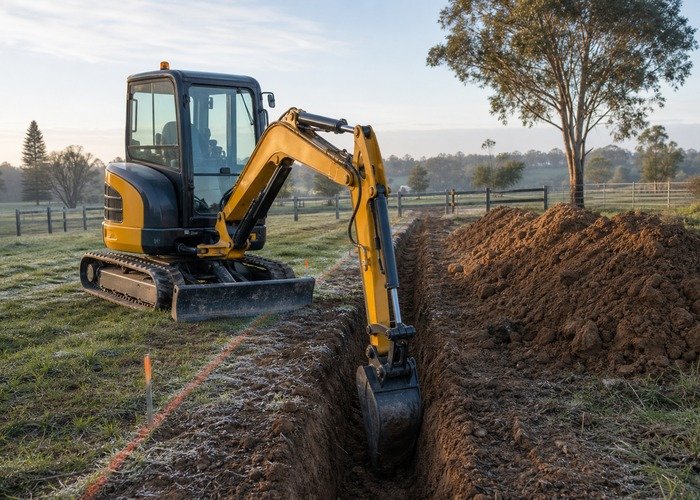
Consider this field example: A drainage run needs consistent fall, so frequent grade checks matter more than reaching the full theoretical depth from each position. The useful answer comes from the whole work cycle—setup, approach, productive pass, turning, travel, cleanup, and storage—not from one impressive moment. If the task cannot be repeated calmly with good visibility and control, change the setup, reduce the load, or choose a different machine.
A common mistake is parking too close to the edge to gain reach or correcting a deep cut by undercutting the trench wall. That shortcut usually transfers the problem somewhere else: extra passes, damaged turf, overloaded components, poor cut or trench quality, unsafe travel, or maintenance that is harder to perform. Record what happened during a test and use that evidence in the buying or service decision.
Bucket choice changes the volume, lump size, and location of spoil. Plan which side receives clean backfill, where unsuitable material goes, and how trucks or loaders will travel. For related machine and attachment choices, use the SeekMach product overview as a second reference. The EPA construction stormwater guidance provides useful independent background for this part of the check.
The practical way to evaluate this point is to write down the job, the operating condition, and the limit that would stop the work. Do not compare a single brochure number in isolation. Check the operator’s manual, attachment instructions, ground conditions, access width, transport plan, and the skill of the person who will use the machine. A combination that works only at its maximum rating leaves little room for wet material, a slope, wear, or an imperfect load.
Consider this field example: A narrow trench can still become inefficient when spoil blocks the excavator’s next position or contaminates clean gravel. The useful answer comes from the whole work cycle—setup, approach, productive pass, turning, travel, cleanup, and storage—not from one impressive moment. If the task cannot be repeated calmly with good visibility and control, change the setup, reduce the load, or choose a different machine.
A common mistake is swinging through people or placing spoil so close that it overloads the trench edge and removes working access. That shortcut usually transfers the problem somewhere else: extra passes, damaged turf, overloaded components, poor cut or trench quality, unsafe travel, or maintenance that is harder to perform. Record what happened during a test and use that evidence in the buying or service decision.
Plans and locate marks are a starting point, not permission for blind digging. Use required tolerance-zone methods, potholing, spotters, and non-destructive exposure procedures. The Common Ground Alliance damage-prevention resources provides useful independent background for this part of the check.
The practical way to evaluate this point is to write down the job, the operating condition, and the limit that would stop the work. Do not compare a single brochure number in isolation. Check the operator’s manual, attachment instructions, ground conditions, access width, transport plan, and the skill of the person who will use the machine. A combination that works only at its maximum rating leaves little room for wet material, a slope, wear, or an imperfect load.
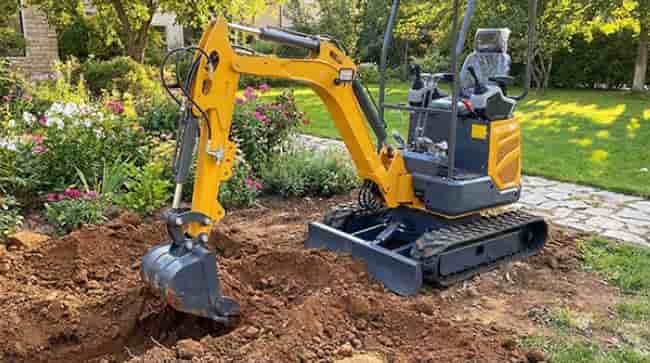
Consider this field example: A trench may begin in open lawn and cross an undocumented irrigation repair near a building, where careful exposure changes the bucket plan. The useful answer comes from the whole work cycle—setup, approach, productive pass, turning, travel, cleanup, and storage—not from one impressive moment. If the task cannot be repeated calmly with good visibility and control, change the setup, reduce the load, or choose a different machine.
A common mistake is using a narrower bucket as justification to dig aggressively near a marked utility. That shortcut usually transfers the problem somewhere else: extra passes, damaged turf, overloaded components, poor cut or trench quality, unsafe travel, or maintenance that is harder to perform. Record what happened during a test and use that evidence in the buying or service decision.
Before buying a bucket, make a short representative test with the exact excavator, coupler, soil, target depth, and spoil plan. Observe filling, release, side clearance, floor shape, and cycle time.
The practical way to evaluate this point is to write down the job, the operating condition, and the limit that would stop the work. Do not compare a single brochure number in isolation. Check the operator’s manual, attachment instructions, ground conditions, access width, transport plan, and the skill of the person who will use the machine. A combination that works only at its maximum rating leaves little room for wet material, a slope, wear, or an imperfect load.
Consider this field example: A slightly wider tapered bucket may outperform a narrow straight bucket in sticky ground because it fills and releases consistently. The useful answer comes from the whole work cycle—setup, approach, productive pass, turning, travel, cleanup, and storage—not from one impressive moment. If the task cannot be repeated calmly with good visibility and control, change the setup, reduce the load, or choose a different machine.
A common mistake is judging productivity from the first easy topsoil pass rather than a complete segment at working depth. That shortcut usually transfers the problem somewhere else: extra passes, damaged turf, overloaded components, poor cut or trench quality, unsafe travel, or maintenance that is harder to perform. Record what happened during a test and use that evidence in the buying or service decision.

There is no universal answer. The finished trench must accommodate the pipe, bedding, joining method, compaction equipment, soil movement, and applicable rules. Start with the installation specification, then choose a compatible bucket that can produce that width.
It removes less soil per linear foot, but sticky material, weak filling, repeated cleanup, or insufficient working width can erase the saving. Trial the actual soil and full work cycle.
A grading bucket can shape and clean suitable material, but its width, lack of teeth, weight, and geometry may make penetration inefficient. Use attachments within their intended and approved application.
The answer depends on depth, soil, protective system, machine load, spoil, and site rules. A competent person and the applicable excavation requirements must establish safe setback and support.
Choose the bucket from the finished installation backward: required width, soil behavior, machine compatibility, depth, grade control, spoil handling, and safety plan. A precise cut is valuable only when the pipe can be installed and the trench can be managed correctly.
Keep notes from the trial section. Actual width, cycle time, plugging, tooth wear, fuel use, and cleanup labor provide better evidence than a generic bucket label.
If bucket choice reveals that the machine lacks comfortable reach or stability, revisit the SeekMach mini excavator selection guide before forcing the attachment to solve a machine-sizing problem.