Telephone/WhatsApp:+86 156 2656 0610

Telephone/WhatsApp:+86 156 2656 0610
Email:seekmach@gmail.com

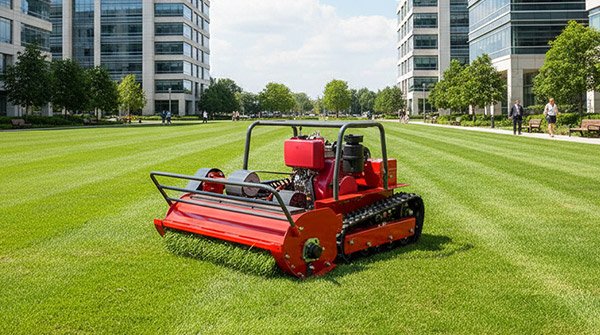
The first 50 hours establish a maintenance baseline for a new mini excavator. New pins settle, hose routing reveals its real rub points, track tension changes, fasteners can need a scheduled recheck, and small leaks become easier to identify once dust begins to collect. The goal is not to treat every sound as a failure. It is to learn what normal looks like while the machine is clean and its records are complete.
This checklist does not replace the operator or service manual. Initial service items vary by engine, hydraulic system, undercarriage, attachment, climate, and manufacturer. Start with the exact serial-number manual and written delivery inspection. Compare the machine with the SeekMach excavator range only after hard requirements such as operating weight, access width, dig depth, auxiliary flow, and transport are documented.
Keep one log from delivery onward. Record hours, date, work type, weather, fuel or charging, fluid added, grease used, track measurement, warning codes, damage, and who performed the check. Photographs of hose routing, coupler locks, track sag, fluid sight glasses, filters, and existing paint marks create a useful baseline without pretending that a photo replaces a measurement.

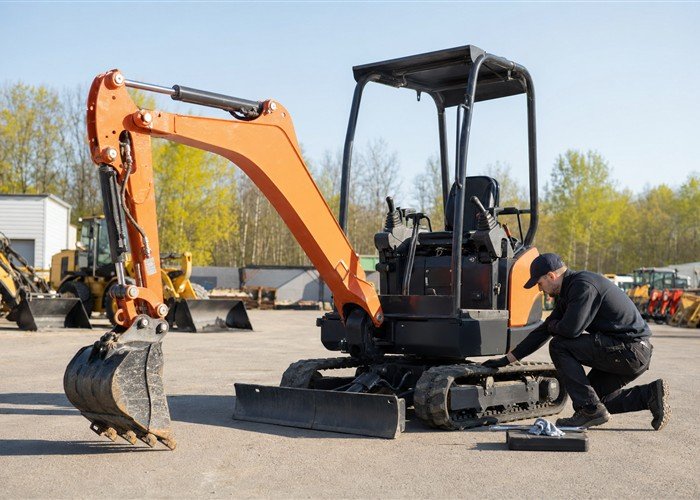
Park on firm level ground, lower the attachment, isolate the machine as instructed, and compare serial numbers, manuals, keys, tools, attachments, safety labels, guards, and promised options with the delivery documents. For related machine planning, use the SeekMach product overview as a second reference. The NIOSH quick-coupler safety bulletin provides independent background for this decision.
Treat this as a work-cycle decision rather than a single specification. Write down the starting condition, the required finish, access limits, material weight, ground condition, weather, operator experience, transport plan, and the point at which work must stop. Check the operator’s manual and attachment instructions for the exact machine. A configuration that works only at its maximum rating leaves no useful margin for wet material, slopes, wear, heat, an off-center load, or an inexperienced operator.
Consider a representative field test: a machine arrives with six hours on the meter and a lightly scuffed counterweight. The owner records the condition, then finds one auxiliary hose touching a bracket only at full curl. Observe setup, approach, productive pass, turning, travel, cleanup, charging or refueling, and storage. Time the complete cycle and note any loss of visibility, traction, control, cut quality, hydraulic response, or battery state. A calm, repeatable cycle is more useful than one impressive pass performed at the limit.
A common mistake is starting work immediately and trying to reconstruct delivery condition after dirt and fresh scratches obscure the evidence. That shortcut moves the problem elsewhere: extra passes, damaged ground, premature component wear, poor finish, missed maintenance, or unsafe travel. Record what the test actually showed, then change the attachment, load, route, schedule, or machine before accepting the risk.
Use the same direction around the machine before every shift. Look underneath first, then inspect tracks, rollers, blade, attachment locks, pins, cylinders, hoses, guards, cooling inlets, lights, controls, and the operator restraint. For related machine planning, use the excavator application solutions as a second reference. The OSHA excavation safety resources provides independent background for this decision.
Treat this as a work-cycle decision rather than a single specification. Write down the starting condition, the required finish, access limits, material weight, ground condition, weather, operator experience, transport plan, and the point at which work must stop. Check the operator’s manual and attachment instructions for the exact machine. A configuration that works only at its maximum rating leaves no useful margin for wet material, slopes, wear, heat, an off-center load, or an inexperienced operator.
Consider a representative field test: a faint damp line at a hose crimp appears before any reservoir change. Marking and reporting it early prevents the owner from guessing later whether it is new. Observe setup, approach, productive pass, turning, travel, cleanup, charging or refueling, and storage. Time the complete cycle and note any loss of visibility, traction, control, cut quality, hydraulic response, or battery state. A calm, repeatable cycle is more useful than one impressive pass performed at the limit.
A common mistake is starting the engine before the walkaround, allowing noise, heat, fan wash, and system pressure to hide a small change. That shortcut moves the problem elsewhere: extra passes, damaged ground, premature component wear, poor finish, missed maintenance, or unsafe travel. Record what the test actually showed, then change the attachment, load, route, schedule, or machine before accepting the risk.
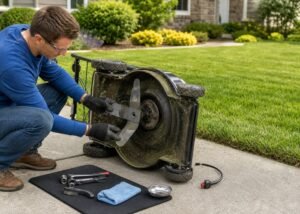
Grease is both lubricant and inspection opportunity. Clean each fitting before connecting the gun, use the specified grease, count the fittings from the manual, and watch where fresh grease exits the joint. For related machine planning, use the mini excavator size guide as a second reference. The NIOSH machinery safety guidance provides independent background for this decision.
Treat this as a work-cycle decision rather than a single specification. Write down the starting condition, the required finish, access limits, material weight, ground condition, weather, operator experience, transport plan, and the point at which work must stop. Check the operator’s manual and attachment instructions for the exact machine. A configuration that works only at its maximum rating leaves no useful margin for wet material, slopes, wear, heat, an off-center load, or an inexperienced operator.
Consider a representative field test: the bucket linkage accepts grease normally, but one boom fitting will not. Cleaning and inspection reveal a damaged fitting rather than a need for excessive gun pressure. Observe setup, approach, productive pass, turning, travel, cleanup, charging or refueling, and storage. Time the complete cycle and note any loss of visibility, traction, control, cut quality, hydraulic response, or battery state. A calm, repeatable cycle is more useful than one impressive pass performed at the limit.
A common mistake is pumping grease through dirty fittings or assuming visible grease near a joint proves the lubricant reached the bearing surface. That shortcut moves the problem elsewhere: extra passes, damaged ground, premature component wear, poor finish, missed maintenance, or unsafe travel. Record what the test actually showed, then change the attachment, load, route, schedule, or machine before accepting the risk.
Rubber-track sag changes with break-in, packed material, temperature, and how the machine was moved before measuring. Use the exact lifting, support, measurement points, and specification in the manual. For related machine planning, use the rubber track maintenance guide as a second reference. The OSHA mobile-equipment safety guidance provides independent background for controlling the work area during this check.
Treat this as a work-cycle decision rather than a single specification. Write down the starting condition, the required finish, access limits, material weight, ground condition, weather, operator experience, transport plan, and the point at which work must stop. Check the operator’s manual and attachment instructions for the exact machine. A configuration that works only at its maximum rating leaves no useful margin for wet material, slopes, wear, heat, an off-center load, or an inexperienced operator.
Consider a representative field test: one track looks loose after working in clay, but cleaning packed material and positioning the machine correctly changes the reading. The manual measurement prevents over-tensioning. Observe setup, approach, productive pass, turning, travel, cleanup, charging or refueling, and storage. Time the complete cycle and note any loss of visibility, traction, control, cut quality, hydraulic response, or battery state. A calm, repeatable cycle is more useful than one impressive pass performed at the limit.
A common mistake is tightening until the track looks straight, which can increase friction and undercarriage wear, or releasing a tension fitting carelessly under pressure. That shortcut moves the problem elsewhere: extra passes, damaged ground, premature component wear, poor finish, missed maintenance, or unsafe travel. Record what the test actually showed, then change the attachment, load, route, schedule, or machine before accepting the risk.
New ownership is the time to establish correct fluid identity and clean handling. Do not mix products because they share a color. Keep caps, funnels, transfer containers, and sampling points clean. For related machine planning, use the mini excavator buying guide as a second reference. The NIOSH hydraulic safety publication provides independent background for this decision.
Treat this as a work-cycle decision rather than a single specification. Write down the starting condition, the required finish, access limits, material weight, ground condition, weather, operator experience, transport plan, and the point at which work must stop. Check the operator’s manual and attachment instructions for the exact machine. A configuration that works only at its maximum rating leaves no useful margin for wet material, slopes, wear, heat, an off-center load, or an inexperienced operator.
Consider a representative field test: a machine used for dry grading accumulates debris rapidly around a cooler even though the hour count is low. A mid-shift screen check prevents temperature rise. Observe setup, approach, productive pass, turning, travel, cleanup, charging or refueling, and storage. Time the complete cycle and note any loss of visibility, traction, control, cut quality, hydraulic response, or battery state. A calm, repeatable cycle is more useful than one impressive pass performed at the limit.
A common mistake is extending service because the machine is new or replacing a filter without first cleaning the housing and surrounding filler area. That shortcut moves the problem elsewhere: extra passes, damaged ground, premature component wear, poor finish, missed maintenance, or unsafe travel. Record what the test actually showed, then change the attachment, load, route, schedule, or machine before accepting the risk.
A quick coupler saves time but does not make engagement self-proving. Follow the coupler procedure, inspect hooks, wedges, pins, retainers, warning systems, hose routing, and perform the specified lock test. The OSHA heavy-equipment rules provides independent background for this decision.
Treat this as a work-cycle decision rather than a single specification. Write down the starting condition, the required finish, access limits, material weight, ground condition, weather, operator experience, transport plan, and the point at which work must stop. Check the operator’s manual and attachment instructions for the exact machine. A configuration that works only at its maximum rating leaves no useful margin for wet material, slopes, wear, heat, an off-center load, or an inexperienced operator.
Consider a representative field test: the dashboard indicates attachment lock, yet a ground-level visual check shows one wedge has not fully seated because dirt is packed in the interface. Observe setup, approach, productive pass, turning, travel, cleanup, charging or refueling, and storage. Time the complete cycle and note any loss of visibility, traction, control, cut quality, hydraulic response, or battery state. A calm, repeatable cycle is more useful than one impressive pass performed at the limit.
A common mistake is trusting an indicator alone or placing a person under a raised attachment to inspect engagement. That shortcut moves the problem elsewhere: extra passes, damaged ground, premature component wear, poor finish, missed maintenance, or unsafe travel. Record what the test actually showed, then change the attachment, load, route, schedule, or machine before accepting the risk.
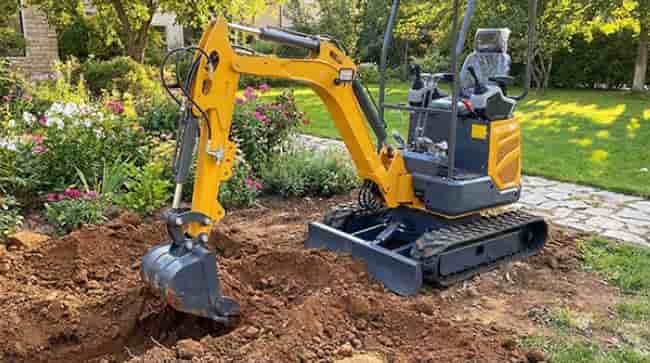
Begin on open, firm, level ground with a competent operator. Practice low-speed travel, swing, blade use, smooth digging, load placement, and shutdown before entering tight work or slopes. The NIOSH equipment visibility diagrams provides independent background for this decision.
Treat this as a work-cycle decision rather than a single specification. Write down the starting condition, the required finish, access limits, material weight, ground condition, weather, operator experience, transport plan, and the point at which work must stop. Check the operator’s manual and attachment instructions for the exact machine. A configuration that works only at its maximum rating leaves no useful margin for wet material, slopes, wear, heat, an off-center load, or an inexperienced operator.
Consider a representative field test: an owner practices placing the bucket inside marked squares and moving small known loads before attempting a drainage trench beside a fence. Observe setup, approach, productive pass, turning, travel, cleanup, charging or refueling, and storage. Time the complete cycle and note any loss of visibility, traction, control, cut quality, hydraulic response, or battery state. A calm, repeatable cycle is more useful than one impressive pass performed at the limit.
A common mistake is using the break-in period to test maximum reach, lift, travel speed, or slope behavior instead of learning predictable control response. That shortcut moves the problem elsewhere: extra passes, damaged ground, premature component wear, poor finish, missed maintenance, or unsafe travel. Record what the test actually showed, then change the attachment, load, route, schedule, or machine before accepting the risk.
The phrase first 50 hours is a planning label, not a universal list. Some machines specify earlier checks, a different engine-oil interval, or dealer-only inspection. Book parts and service before the hour meter reaches the threshold.
Treat this as a work-cycle decision rather than a single specification. Write down the starting condition, the required finish, access limits, material weight, ground condition, weather, operator experience, transport plan, and the point at which work must stop. Check the operator’s manual and attachment instructions for the exact machine. A configuration that works only at its maximum rating leaves no useful margin for wet material, slopes, wear, heat, an off-center load, or an inexperienced operator.
Consider a representative field test: at hour 42 the owner schedules downtime, confirms filter numbers, and identifies a minor hose-routing correction so the service visit handles both maintenance and observation. Observe setup, approach, productive pass, turning, travel, cleanup, charging or refueling, and storage. Time the complete cycle and note any loss of visibility, traction, control, cut quality, hydraulic response, or battery state. A calm, repeatable cycle is more useful than one impressive pass performed at the limit.
A common mistake is waiting until hour 50 to read the schedule, then continuing critical work while parts, tools, or qualified service are unavailable. That shortcut moves the problem elsewhere: extra passes, damaged ground, premature component wear, poor finish, missed maintenance, or unsafe travel. Record what the test actually showed, then change the attachment, load, route, schedule, or machine before accepting the risk.

No. The exact initial service comes from the serial-number-specific manual and warranty terms. Use 50 hours as a reminder to find and schedule the prescribed items, not as permission to invent a universal fluid or filter change.
Follow the manual and attachment instructions. Water, abrasive dust, mud, and high-cycle work can require shorter intervals. Clean each fitting and verify lubricant reaches the joint.
No. Correct track sag is a measured range under a specified setup. Excessive tension can increase wear and power loss; too little can increase de-tracking risk.
Record hours, date, task, operator, inspections, measurements, fluids, grease, filters, warning codes, photos, repairs, parts, and unresolved observations.
The first 50 hours should produce two results: a correctly serviced machine and a trustworthy baseline. You should know its normal sounds, control response, fluid levels, grease behavior, track measurements, hose routing, and attachment locks.
Escalate any repeat leak, unusual heat, warning code, abnormal wear, damaged restraint, insecure attachment, or uncontrolled movement. Early ownership is not the time to normalize a defect.
Keep the checklist beside the manual and update it after the initial service. The value is consistency: the same inspection, the same measurement method, and a written record that makes change visible.