Telephone/WhatsApp:+86 156 2656 0610

Telephone/WhatsApp:+86 156 2656 0610
Email:seekmach@gmail.com


Master these essential fundamentals to operate compact excavators safely and efficiently from day one:
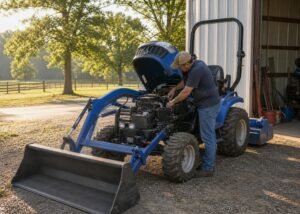
• Complete pre-operation inspections daily – Check fluids, hydraulics, and safety systems to prevent costly breakdowns and ensure safe operation
• Match excavator weight class to your project needs – Choose 1-2 tons for small jobs, 3-6 tons for residential work, 7-10 tons for commercial projects
• Master the joystick controls systematically – Left stick controls arm/swing, right stick controls boom/bucket; practice smooth combinations at low throttle first
• Maintain proper digging form with blade support – Keep blade lowered for stability, dig within 35-45 degree stick angle for maximum efficiency and safety
• Follow regular maintenance schedules religiously – Daily fluid checks and 100-500 hour oil changes prevent expensive repairs and extend equipment life
Success with compact excavators comes from combining proper equipment selection, safety protocols, control mastery, and consistent maintenance practices. Start with these fundamentals and build your skills progressively for long-term operational success.

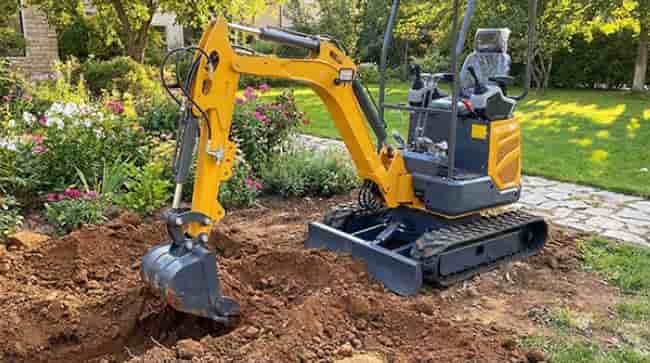
Operating a compact excavator might seem intimidating at first, but with proper guidance, you can master this versatile machine faster than you think.
These powerful machines are particularly valuable for projects in tight spaces where larger equipment simply won’t fit. Whether you’re eyeing a new compact excavator for sale, considering a used compact excavator for sale, or exploring mini compact excavator options, understanding the fundamentals of operation is your first step toward success.
In this guide, we’ll walk you through everything you need to know, from choosing the best compact excavator and essential compact excavator attachments to mastering controls and advanced techniques. Let’s get started!
Before you start operating, selecting the right machine sets the foundation for efficient work. I recommend evaluating three critical factors: the size of your job site, the type of terrain, and the specific tasks you’ll perform. Working in backyards with tight access points requires different specifications than open commercial sites. Measure your access points carefully and consider whether you need a zero tailswing model for confined spaces or a conventional tailswing for open areas with greater lifting capacity.
Pay attention to dig depth and reach requirements. If you’re installing drainage pipes or fiber optics, match those installation specs to the machine’s capabilities. The auxiliary hydraulic flow matters when you plan to use attachments like grapples or hydraulic breakers. Operating weight affects transportation too. Lighter models won’t require special permits or commercial driver’s licenses in many states.
Compact excavators are categorized by operating weight, typically ranging from 1 to 10 metric tons. Each class serves distinct purposes:
1-2 metric tons are perfect for small-scale projects like digging fence post holes and minor landscaping. 3-4 metric tons provide balanced power for residential construction and utility work. 5-6 metric tons handle mid-size construction projects and extensive landscaping jobs. 7-8 metric tons are designed for commercial construction requiring increased lifting capacity. 9-10 metric tons represent the largest compact category, built for heavy-duty applications and major earthmoving tasks.
Digging depth varies by class, typically between 1.5 to 6 meters, while max dump height ranges from approximately 1.8 to 6 meters depending on operating weight.
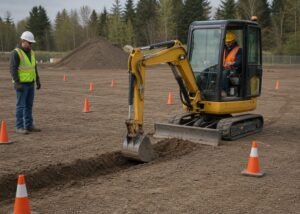
OSHA requires pre-shift inspections for all construction equipment under 29 CFR 1926.20 and 1926.600, performed by a competent person. You must complete proper training covering machine controls, excavation techniques, safety protocols, and equipment maintenance before operation. Training certification requires passing an exam with a score of 70% or better.
While you don’t need a specific heavy equipment license, you need a valid driver’s license. Employers favor candidates with documented training and practical evaluation completion.
Never skip the pre-operation inspection. A thorough daily check takes 10-15 minutes and prevents failures worth 10-15 hours of downtime. Perform inspections before every shift with the engine cold and the machine on level ground for accurate fluid readings.
Check engine oil, hydraulic fluid, coolant levels, and fuel. Inspect hydraulic hoses for leaks, cracks, or bulges. Examine tracks for wear, tension, and damage. Verify boom, stick, and bucket condition for structural cracks or loose pins. Test the seatbelt, horn, backup alarm, lights, and fire extinguisher. Document any deficiencies immediately and tag the machine out of service if you find active hydraulic leaks, non-functional brakes, or ROPS structural damage.
Climb into the cab using three points of contact and fasten your seatbelt first. Ensure the safety lock lever is in the upright position. Insert the key and turn it to the “ON” position, allowing the engine to preheat. Hold for 25 to 30 seconds in temperatures below 35°F, or 10 to 15 seconds in warmer conditions. Turn the key clockwise to start the engine. Let it idle for a few minutes to allow hydraulic fluid to circulate and lubricate components. Lower the safety lock lever to engage hydraulic controls.
Your instrument panel displays engine temperature, hydraulic pressure, battery status, fuel level, coolant temperature, and safety system status. Check for error codes or warning lights during startup. Red or yellow symbols indicate problems requiring immediate attention. Monitor oil pressure and temperature gages throughout operation to detect issues early.
The left joystick controls arm and swing functions. Push forward to raise the arm, pull back to retract it. Push left to swing the cab left, push right to swing right. The right joystick controls boom and bucket operations. Pull back to raise the boom, push forward to lower it. Push left to curl the bucket in, push right to dump. Modern machines allow you to reconfigure joystick settings through the monitor.
Track pedals control movement. Push both forward to advance, pull both back to reverse. Push the right pedal forward while pulling the left back to turn right, and vice versa. The right foot pedal swings the boom left or right without rotating the cab.
Start with smooth, controlled movements at low throttle. Practice combining joystick functions while stationary before digging. Coordinate arm extension with bucket curling to develop muscle memory.
Turn the ignition key to “OFF” immediately. Lower the boom and bucket to the ground, engage the parking brake, and disconnect the battery if necessary.
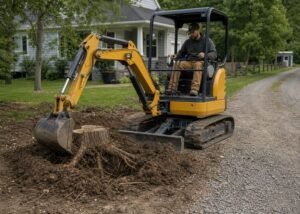
Stability begins with blade placement. Lower the blade to the ground before starting any cut to maximize leverage and prevent tipping. Position the blade toward your dig for harder materials like rock or concrete, transferring digging pressure to the ground rather than the tracks. The optimal digging range for your stick starts about 35 to 45 degrees from vertical back to a vertical position. Digging outside this range lowers efficiency and lengthens cycle times.
Start at the top and work down in layers. Position your compact excavator centered directly over the planned trench line, keeping tracks parallel to slope lines. Maintain arm and stick angle between 35-45 degrees for peak leverage. Dig to full depth in one section before widening to create flat sidewalls and bases.
Overlap your passes by moving just one-third of your bucket width each time to eliminate washboard effects. Lower your blade a half-inch below grade line and maintain steady forward movement. For loading, position the bench height at the haul vehicle’s sideboards. Set up for trucks to come down the left side for optimal loading angle and visibility.
Most compact excavators safely operate on slopes up to 30 degrees. Travel with track ends facing uphill and keep the boom low when moving. Position the blade low and in contact with the ground while excavating on slopes. Work from the top of the slope downward to prevent collapse.
Poor site preparation causes instability. Digging at incorrect angles damages components and destabilizes the machine. Avoid overloading, which strains hydraulics and risks tip-over. Different soil types require different approaches—using the same method everywhere reduces efficiency.
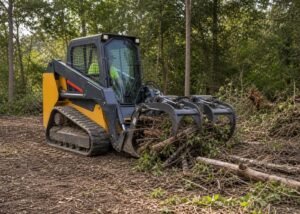
Buckets serve multiple functions. Standard digging buckets handle trenching and earthmoving, grading buckets level terrain, and skeleton buckets separate stones from soil. Hydraulic breakers demolish concrete and asphalt structures. Augers drill precise holes for fence posts and tree planting. Grapples grip irregularly shaped materials like logs and debris. Compactors pack backfill to prevent settling. Rippers break frozen ground and compacted soil. Match attachments to your excavator’s hydraulic system and power output to optimize performance and reduce wear.
Modern coupler systems speed up attachment changes. Mechanical couplers require manual pin engagement outside the cab. Hydraulic couplers let you switch attachments from the operator seat. For hydraulic attachments like breakers and augers, verify proper flow and pressure settings before operation. Improper installation shortens attachment life and compromises safety.
Reset the bucket to a safe position after each shift. Clean mud and debris from tracks, hydraulic lines, and key components. Inspect bucket teeth for wear. Check all pivot points and grease where needed.
Check fluids daily. Change engine oil every 100-500 hours. Maintain proper track tension. Replace filters at recommended intervals.
Dig from top layers down rather than bottom up. Keep your job site organized to prevent delays.
You now have everything you need to start operating a compact excavator safely and efficiently. From selecting the best compact excavator and mastering the controls to advanced digging techniques and proper maintenance, these fundamentals will serve you well.
Take your time practicing each skill before moving to complex tasks. Consistency matters more than speed initially. Keep safety as your top priority, maintain your equipment regularly, and your proficiency will grow with every hour of operation.
Q1. Is it difficult to learn how to operate a compact excavator?
The learning curve depends on your background. If you have prior experience with heavy machinery, you’ll pick it up quickly with basic familiarization. Complete beginners can still learn to operate compact excavators, but formal training is highly recommended to ensure safe and efficient operation from the start.
Q2. What are the main control modes for excavators and which should beginners use?
Excavators operate in two primary control modes: SAE and ISO. In ISO mode, the left joystick controls the arm and boom while the right joystick operates the stick and bucket. SAE mode reverses these functions. Beginners should choose one mode and stick with it consistently, as switching between modes can be confusing and affect operational efficiency.
Q3. How long does it typically take to complete excavator operator training?
Training duration generally ranges from 4 to 8 hours, depending on your prior experience level and the comprehensiveness of the hands-on practice provided. Practical training requires access to an actual excavator and adequate space for safe operation exercises.
Q4. What are the most common mistakes beginners should avoid when operating compact excavators?
Key mistakes include inadequate site preparation leading to instability, digging at incorrect angles that can damage components, overloading the bucket which strains hydraulics and risks tipping, and using the same digging technique for all soil types instead of adapting to different ground conditions.
Q5. Do I need a special license to operate a compact excavator?
You don’t need a specific heavy equipment license to operate a compact excavator, but you must have a valid driver’s license. However, you are required to complete proper training covering machine controls, excavation techniques, safety protocols, and equipment maintenance, and pass a certification exam with at least 70% to demonstrate competency.