Telephone/WhatsApp:+86 156 2656 0610

Telephone/WhatsApp:+86 156 2656 0610
Email:seekmach@gmail.com

Master these essential techniques to operate your 1.3 ton mini excavator safely and efficiently, from basic controls to advanced terrain handling.
• Complete daily safety checks in under 10 minutes to prevent 70% of machine failures and extend service life
• Master joystick controls: left stick manages stick/rotation, right stick controls boom/bucket movements
• Never exceed 70% slope grade (35 degrees) and always track straight up/down slopes, never sideways
• Position boom forward when climbing slopes and use blade downhill for maximum stability
• Practice single control movements at low speed before attempting compound motions for precision digging
• Implement auto-idle and eco mode features to improve fuel efficiency by up to 50% through proper training
Professional excavator operation combines technical knowledge with consistent safety practices. Focus on smooth, deliberate movements and always respect your machine’s 1750mm digging depth and 3100mm reach limits for optimal performance.
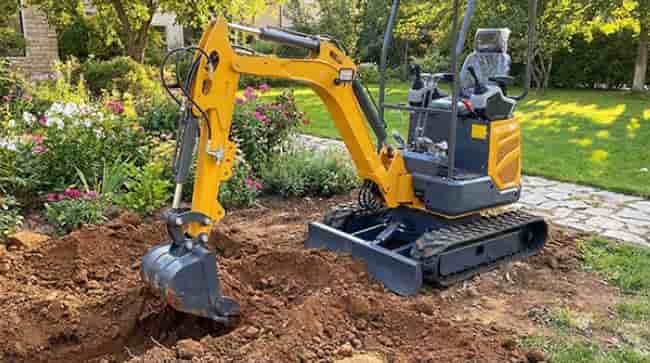
A 1.3 ton mini excavator can dig as deep as 1750 mm and reach up to 3100 mm horizontally, but without proper handling techniques, you’re leaving performance on the table.
Most operators struggle with precision control, fuel efficiency, and safe maneuvering in tight spaces. In reality, mastering a mini excavator isn’t just about moving levers. It requires understanding your machine’s capabilities, executing pre-operation checks, and applying advanced techniques for challenging terrain.
In this guide, we’ll walk you through everything from basic controls and safety protocols to advanced handling strategies that professional operators use daily. Whether you’re working on narrow job sites or uneven ground, these practical techniques will help you operate your 1.3 ton mini excavator with confidence and efficiency.
Your 1.3 ton mini excavator operates through a hydraulic-powered arm attached to a track-mounted chassis. The arm consists of three primary sections: the boom (extending from the cab), the stick or dipper (connecting the boom to the bucket), and the bucket itself. Each component moves through dedicated hydraulic cylinders that convert fluid pressure into precise linear motion.
Control systems follow two main patterns. ISO controls use the right-hand lever for boom and bucket functions, while the left-hand lever manages the stick and swing movements. SAE controls reverse this arrangement, positioning boom and swing on the left lever, with stick and bucket on the right. Most machines allow switching between patterns to match operator preference.

Beyond joysticks, you’ll find track pedals or levers that control forward, backward, and turning movements. The dozer blade lever, typically positioned on the right side of the cab, raises and lowers the front blade for stability during digging operations. Auxiliary pedals control additional functions such as boom swing and attachment operation.
Safety features protect you during operation. ROPS (Roll-Over Protective Structure) forms the protective frame around the cab, but it only functions properly when you wear your seatbelt. FOPS (Falling Object Protective Structure) shields against debris in demolition work. Newer models include Active Interference Detection with sensors that can detect workers within 15 feet and automatically disable hydraulics.
A 1.3 ton mini excavator weighs approximately 1000 kg in working condition. The compact footprint makes it suitable for confined job sites where larger machines cannot operate.
Key dimensions for a standard 1.3 ton model include a transportation length of 2325 mm, total width of 1100 mm, and height of 2270 mm. The track shoe width measures 180 mm with a gage of 920 mm. Track grounding length reaches 1050 mm, providing stable support across various terrains.
The tail turning radius of 795 mm allows maneuvering in tight spaces. This minimal swing radius proves valuable when working between buildings or around obstacles.
Maximum digging height for a 1.3 ton excavator reaches 2700 mm, with maximum unloading height at 1840 mm. Maximum digging depth extends to 1710 mm, while maximum digging distance stretches to 2910 mm.
For the 1-2 ton class, typical maximum reach ranges from 3.0 to 3.5 meters (10 to 12 feet). Bucket capacity sits at 0.02 m³ for standard configurations. The machine handles slopes up to 30 degrees, though stability decreases as you approach this limit.
Minimum turning radius measures 1530 mm. At this turning radius, maximum height reaches 2100 mm. These specifications directly affect your ability to position the machine and execute precise digging motions in restricted areas.
Daily inspection routines prevent 70% of machine failures and extend service life. Before starting your 1.3 ton mini excavator, complete these critical safety checks in under ten minutes.
Walk around the machine and inspect hydraulic hoses, cylinders, and connections for leaks, cracks, or bulges. Check swivel joints, swing bearings, and slew rings where gradual wear commonly causes fluid loss. Hydraulic fluid leakage reduces lifting capacity and compromises operator safety.
Examine hoses for outer cover cuts exposing internal reinforcement, abrasion wear from equipment contact, weather-induced surface cracking, and localized bulging indicating internal failure. Test fittings by hand for tightness, as loose connections leak and vibrate during operation. Verify hose routing prevents contact with hot exhaust or sharp edges through the full range of motion.
Pull the dipstick, clean it, reinsert fully, then remove to check the oil level between “Full” and “Add” marks. After the engine runs, wait 15 minutes before checking. When the indicator shows “low,” friction between components produces foreign sounds indicating damage.
Check coolant in the overflow tank between “Low” and “Full” lines when the engine is cold. Verify hydraulic fluid stays in the proper range through the sight glass or dipstick. Fill fuel after daily shutdown to prevent water formation on the inner wall of the fuel tank.
Check track tension every 50 hours of operation, though daily checks become routine for experienced operators. Proper tension extends undercarriage life and minimizes wear on track drive components.
Measure sag at 10-15mm between the bottom roller closest to center and the track. Tracks that are too loose risk de-tracking during turns, while overtight tracks accelerate bearing wear and increase fuel consumption.
Inspect bucket teeth, cutting edges, and welds for cracks or wear. Check all pins are secure and not excessively worn, verify bolts are tight, and confirm coupler engagement if applicable. Never operate without the mechanical safety pin engaged. Perform a ground test by placing the attachment on the ground and applying pressure to ensure secure engagement.
Insert the key and turn to ON, waiting 3-5 seconds for the fuel pump to prime. After instrument panel self-checks complete with no red alerts, turn to START. Let the engine idle for 3-5 minutes, extending to 5-8 minutes in winter conditions. Normal operating temperatures require coolant above 60°C and hydraulic oil above 40°C. During warmup, gently move joysticks to purge air from the hydraulic system.
The left joystick controls stick and rotation: push forward to retract the stick, pull back to extend it, move left or right to rotate the cab. The right joystick manages boom and bucket: push forward to dump, pull back to curl, move left to lower the boom, right to lift. Practice single actions at low speed before attempting compound movements.
Push both track pedals forward for straight movement, pull both back to reverse. For turning, push the right pedal forward while pulling left back to turn left, and vice versa. Square the cab over tracks before digging for maximum stability.
Position bucket teeth at a 30° angle to the ground with arm angle between 30-45° for optimal digging force. Untere the boom until bucket teeth enter dirt halfway, then curl the bucket while simultaneously lifting the boom. Avoid overloading, which strains hydraulics and risks tipping.
Lower the blade to ground level during digging for increased stability. Balance your 1.3 ton mini excavator by extending or retracting the stick as needed. Keep loads as close to ground as possible during transport.
Consult lift charts before any lifting operation. Never exceed 75% of tipping load capacity. Position the machine on firm, level ground and lift at low idle for better awareness and control. Use the blade downhill for stability when working on slopes.
Never operate your 1.3 ton mini excavator on slopes exceeding 70%, which equals a 35-degree angle. Slopes shift your center of gravity, increasing rollover risk, while tilted engines affect lubrication and fuel distribution. Rain, mud, ice, and loose rocks compromise hill stability even below the 70% threshold.
Position your boom in front when climbing slopes to maintain traction on front tracks and prevent backward rolling. Keep throttle high for maximum power. For steep grades, extend the bucket as far as possible, grab soil deep, then use boom power to pull the machine forward while tracking simultaneously. Track straight up and down the slope, never sideways. If tracks run parallel to the slope and catch an edge, the machine will tip.
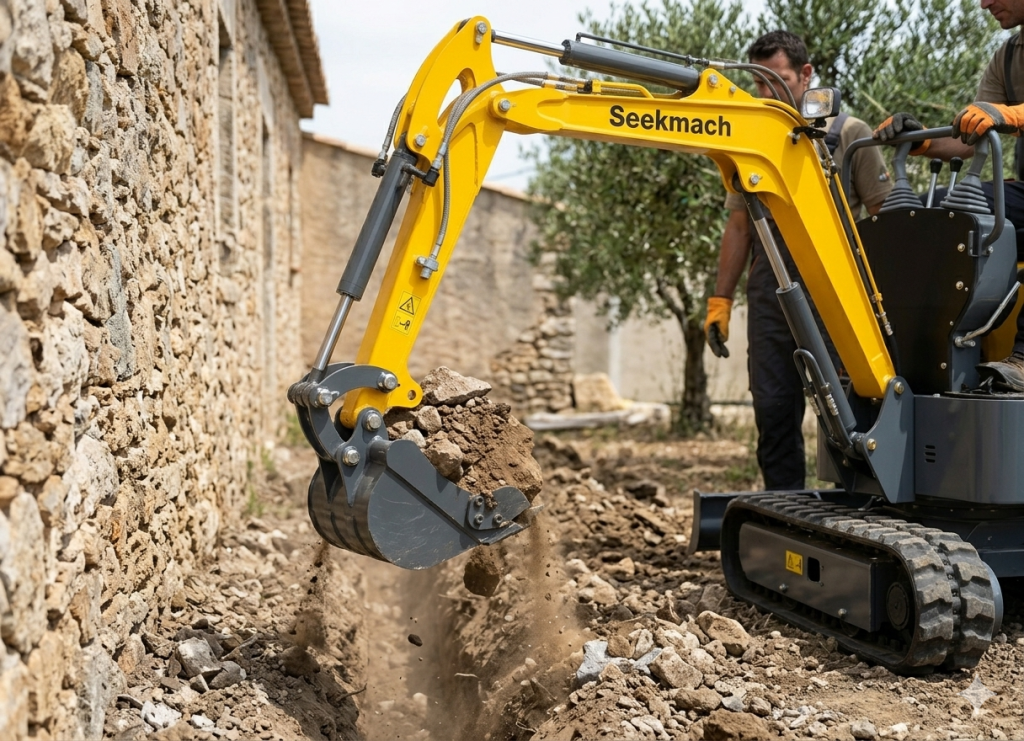
Zero tail swing design keeps the counterweight within track width during rotation, allowing operation close to walls without damage. Control your speed in confined areas. Rushed, jerky movements cause over-digging, wall scraping, and utility strikes. Plan your work path before starting to minimize repositioning.
Auto-idle reduces fuel consumption by switching to high idle after five seconds of inactivity. Auto engine shutdown activates after five minutes of idle time. Eco mode improves efficiency by 5% through controlled pump flow without reducing power. Operator training can cut fuel consumption up to 50%.
You now have everything you need to handle your 1.3 ton mini excavator like a seasoned professional. From mastering basic controls to tackling challenging slopes, these techniques will transform your operating confidence.
Remember, precision comes with consistent practice. Start with daily safety checks, focus on smooth control movements, and gradually apply advanced strategies as you gain experience.
Keep practicing these methods, and you’ll notice improved efficiency and safer operations. Without a doubt, your excavator handling skills will reach professional levels sooner than you think.
Q1. What are common mistakes to avoid when operating a mini excavator?
Key mistakes include incorrect blade positioning during digging operations, improper trenching techniques, operating with loads extended too far from the machine, misjudging the center of gravity which can lead to tipping, and poor parking practices. Always lower the blade for stability during digging, keep loads close to the ground, and ensure you’re on level ground before dismounting.
Q2. How do you control the joysticks on a mini excavator?
The left joystick typically controls the stick and rotation: push forward to retract the stick, pull back to extend it, and move left or right to rotate the cab. The right joystick manages the boom and bucket: push forward to dump, pull back to curl the bucket, move left to lower the boom, and right to lift it. Practice single movements at low speed before attempting combined actions.
Q3. Is it difficult for beginners to learn mini excavator operation?
Mini excavators are relatively easy to operate compared to larger equipment. Their compact size, responsive controls, and straightforward hydraulic systems make them beginner-friendly. With proper training on basic controls, safety procedures, and a few hours of practice, most operators can develop competence in fundamental operations like digging, loading, and maneuvering.
Q4. What safety checks should be performed before operating a mini excavator?
Daily pre-operation checks should include inspecting hydraulic systems for leaks or damage, checking engine oil and fuel levels, verifying coolant levels, testing track tension, and examining bucket attachments for wear or loose pins. These inspections take under ten minutes but prevent approximately 70% of machine failures and ensure safe operation.
Q5. What is the maximum safe slope angle for operating a 1.3 ton mini excavator?
Never operate on slopes exceeding 70% grade (35-degree angle). When working on slopes, always position the boom in front when climbing to maintain traction, track straight up and down rather than sideways, and use the blade on the downhill side for added stability. Wet or loose conditions require even more caution regardless of the angle.