Telephone/WhatsApp:+86 156 2656 0610

Telephone/WhatsApp:+86 156 2656 0610
Email:seekmach@gmail.com

Choosing the wrong excavator bucket sizes doesn’t just slow your dig — it quietly destroys productivity from the ground up, one hydraulic cycle at a time.
Most operators instinctively reach for a larger bucket to move more material per pass. The logic seems sound: more volume means fewer cycles, fewer cycles means faster completion. But that reasoning breaks down the moment the bucket meets dense clay, compacted gravel, or rocky substrate. The core issue is physics. Hydraulic breakout force is a fixed output of your machine’s system. When you spread that force across a wider cutting edge, you reduce the pressure per inch of blade — and penetration in hard soil depends entirely on concentrated pressure, not total force.
A wider bucket doesn’t give you more breakout force; it dilutes the force you already have.
Think of it this way: pressing a wide spatula into packed earth requires far more effort than driving a narrow chisel into the same spot. The machine’s hydraulics don’t change. What changes is how efficiently that energy transfers into the ground. As EquipmentWorld notes, selecting a bucket that is too wide for the soil’s penetration resistance increases drag and fuel consumption while reducing the breakout force at the teeth. That drag compounds quickly — higher resistance means longer fill times, greater stress on bucket pins and linkages, and elevated fuel burn per cubic yard of material moved.
This trade-off between volume and breakout efficiency is the central tension in bucket selection. In practice, a smaller, narrower bucket often outperforms a larger one in hard-digging conditions because each tooth carries a proportionally higher load. Understanding ground resistance before selecting your attachment isn’t optional — it’s the first calculation that determines every decision after it, including how you read a bucket capacity chart.
Capacity charts are more useful — and more misleading — than most operators realize, because the numbers printed on them are starting points, not operating instructions.
The chart only tells you what the bucket can hold in theory; soil density, machine limits, and attachment weight determine what it can safely hold in practice.
SAE vs. CECE Standards shape the numbers before you even start reading a chart. The SAE standard (common in North America) calculates heaped capacity using a 1:1 slope angle, while the CECE standard (prevalent in Europe) uses a 1:2 slope. The result: the same physical bucket can show a higher rated capacity under SAE than CECE. If you’re sourcing attachments internationally or comparing specs across manufacturers, this difference can run 10–15% — enough to throw off your load calculations entirely.
Nominal capacity is the manufacturer’s baseline figure, typically measured under ideal lab conditions with a uniform, moderate-density material. In practice, that number shifts the moment you switch soil types. What typically happens on mixed-material sites is that operators run the nominal spec without adjusting for density, inadvertently overloading the hydraulic system on dense clay or compacted fill. According to the Association of Equipment Management Professionals, bucket capacity and width must always be calculated against the material’s density to avoid exceeding the machine’s Rated Operating Capacity (ROC).
The ROC tie-in is where bucket weight becomes critical. Every pound of steel in your ground engaging tools — bucket, teeth, side cutters, and wear plates — counts against the machine’s usable lift capacity before a single cubic inch of soil enters the bucket. Heavier reinforced buckets offer durability but shrink your effective payload window. A common pattern on compact excavators is choosing the wrong size machine for the attachment, which compounds stability issues when working on grades or near trench edges.
Key variables to cross-reference on any capacity chart:
⚠️ Warning: Never select a bucket based on capacity alone. If bucket weight plus material weight exceeds your machine’s ROC at maximum reach, you risk tipping — regardless of how well the bucket itself performs.
Understanding these chart variables sets the stage for the next critical distinction: the difference between what a bucket can hold and what it actually carries on a real dig cycle.
Every excavator bucket capacity chart lists two distinct numbers — and confusing them is one of the most expensive mistakes a project lead can make.
Struck capacity is the simpler figure: the level volume of material that fits inside the bucket when its contents are scraped perfectly flush with the cutting edge rim. Think of it as the absolute minimum the bucket holds under any condition. It’s a controlled, geometry-based measurement with no assumptions about how material behaves in the real world.
Heaped capacity adds the volume of material piled above that rim — the mound that forms naturally when you scoop loose soil, gravel, or debris. According to the SAE J296 standard, heaped capacity is calculated using a 1:1 slope angle, meaning the pile rises at a 45-degree angle from the rim edge. That’s a controlled laboratory assumption, not a guarantee of field performance.
Here’s where the real variability enters:
This distinction hits hardest on cycle time calculations. If a project schedule assumes heaped capacity on every pass but site conditions deliver struck-level loads, the actual volume moved per hour drops significantly — a miscalculation that compounds across hundreds of cycles daily. For smaller machines operating at the limits of their hydraulic output, the gap between assumed and actual capacity directly affects whether production targets are realistic or purely theoretical.
That variance between struck and heaped performance is really a function of one variable: how the material itself behaves when disturbed. And that behavior — governed by cohesion, moisture, and density — is exactly what the fill factor captures.
Fill factor is the variable that turns a capacity chart from a spec sheet into a real-world productivity tool — and ignoring it can quietly wreck your cycle times.
The fill factor determines what percentage of a bucket’s rated capacity you’ll actually move on each pass. According to SAE International Standard J296, cohesive materials like moist loam can achieve fill factors of 100–110%, meaning the bucket carries more than its rated heaped capacity vs struck capacity figure suggests. Rock and hardpan, on the other hand, drop fill factors to 60–75%, leaving a quarter or more of your bucket volume empty on every dig cycle.
Why the gap is so wide comes down to material behavior. Moist loam packs and flows into a bucket the way it’s designed to be filled — particles cling together and mound cleanly above the cutting edge. Dry, angular rock fragments won’t consolidate; they bridge across the bucket opening and leave voids throughout. What looks like a full bucket on the surface is significantly underloaded in the middle.
Soil moisture content compounds the issue in a different direction. Wet material doesn’t just fill more easily — it weighs more. Saturated clay can run 20–30% heavier per cubic yard than its dry equivalent, meaning a “full” bucket may exceed your machine’s rated lift capacity even if the volume looks normal. This is where wet clay introduces another hazard: suction. When a bucket seats deeply into waterlogged clay, the vacuum created on extraction can spike the actual pulling load well beyond calculated breakout force values, stressing both the arm cylinder and the undercarriage. Breakout force demands in ground-engaging equipment follow similar physics across machine classes.
The practical correction is straightforward: size the bucket down for high-density material. A 36-inch general-purpose bucket rated for sandy loam may need to be swapped for a narrower, heavier-duty model when working in river clay or compacted gravel — not because breakout force is insufficient, but because load weight per cycle will consistently overrun safe limits. Those tradeoffs become even more pronounced when working in confined spaces, which is where mini excavator bucket geometry enters the equation.
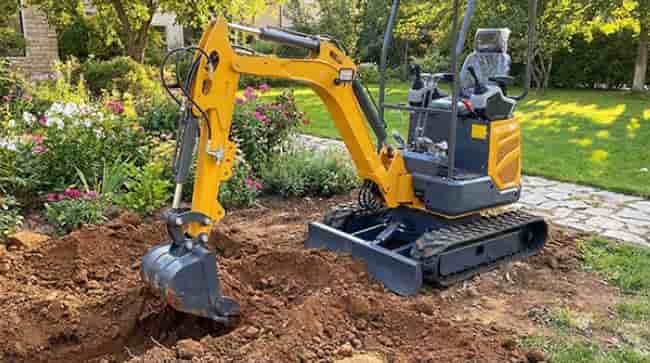
Choosing the right mini excavator bucket width isn’t just a spec decision — it’s the difference between a clean, efficient trench and a costly rework that eats into your project margin.
The 12-inch to 24-inch range defines practical utility for mini excavators in the 35HP–90HP class. These widths cover the vast majority of drainage, irrigation, and utility trenching applications where compactness and precision matter more than raw volume. A 12-inch bucket handles tight conduit runs and landscape drainage with minimal soil disturbance, while a 24-inch bucket opens enough room for dual-pipe irrigation layouts or standard storm drain installations. In practice, operators running municipal or agricultural work rarely need to step outside this band — it’s a window that balances power and reach without overloading the machine’s breakout force.
Trenching width directly governs material waste. Matching bucket width to pipe diameter plus clearance — typically 6 inches of working room on each side — keeps backfill volumes manageable and reduces compaction labor. For a 4-inch drainage tile, a 16-inch bucket is often the sweet spot. Going wider means more spoil to rehandle; going narrower risks pipe damage during placement.
V-bottom and trapezoidal bucket geometries earn their place in agricultural trenching precisely because field soils can shift mid-cut. According to Construction Equipment Magazine, specialized V-bottom profiles outperform standard trenching buckets in stable soils by channeling material cleanly to center, reducing wall drag and speeding cycle times on repetitive passes across long irrigation runs.
Versatility, however, has a ceiling. A single bucket width rarely handles every task on a mixed-use site. Operators increasingly pair a dedicated trenching width with a wider cleanup or grading bucket, swapping via quick-coupler systems to stay productive across job phases. That quick-coupler flexibility also opens the door to a conversation about what’s mounted to the bucket itself — because the shell geometry is only part of the performance equation. What’s attached to the cutting edge plays an equally decisive role.
The bucket shell is only half the story — the teeth, shrouds, and cutting edges attached to it determine how effectively your machine converts breakout force into productive digging.
GET selection can make or break performance on the same machine in the same soil. A general-purpose tooth works well in medium-density material, but swap conditions and you’re either burning through consumables or leaving productivity on the table.
🔩 Rock Teeth (Tiger/Penetration Teeth): Narrower tip profile, hardened steel alloy, designed for maximum ground entry in dense or fractured material. Trade-off: faster wear in abrasive sandy soils due to concentrated contact stress.
🌿 General-Purpose Teeth: Wider, flatter tip spreads load across softer material. Efficient in topsoil, loose fill, and mixed conditions. Poor penetration in compacted hardpan — the broader face deflects rather than splits.
🔲 Side Cutters (Wing Shrouds): Bolt-on edge plates that extend the bucket’s lateral cutting width. In sticky clay, they shear the soil cleanly along the bucket wall, preventing the suction-lock that forces the arm cylinder to work harder and strains the stick.
As noted by EquipmentWorld, for hard-packed or rocky soils, a narrower bucket with high-quality wear shrouds consistently outperforms a wide general-purpose bucket — a useful reminder that geometry and GET work together, not independently.
Maintenance tip: Inspect tooth pins and retainer clips every 40–50 operating hours. A loose tooth doesn’t just wear faster — it transfers uneven stress into the adapter, which damages the shell itself and turns a $30 consumable problem into a $300+ repair.
Selecting between impact resistance and abrasion resistance is the core GET decision. Impact-rated teeth use a tougher, slightly softer alloy to absorb shock without cracking in rocky ground. Abrasion-resistant teeth use harder steel that holds an edge longer in sand and gravel but can fracture under repeated impact loading. Matching the metallurgy to the dominant stress type is what keeps your GET costs predictable across a project’s lifecycle.
With GET dialed in for your bucket shell, the next variable is the soil itself — and how dramatically material type shifts your size and configuration decisions.
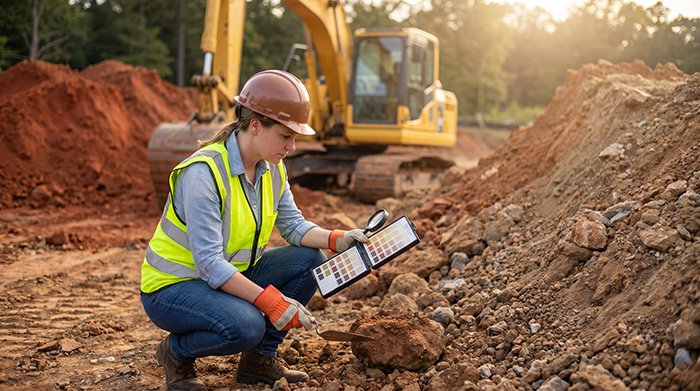
Soil type is the single most practical variable in bucket selection — get the match wrong, and you’re fighting physics on every pass.
Wet clay, loose topsoil, hardpan, and sand each demand a distinct bucket strategy, and understanding why starts with density and soil penetration resistance.
Wet Clay is the most punishing material for over-sized buckets. According to AEMP data, wet clay weighs approximately 3,000 lbs per cubic yard — nearly 43% heavier than loose topsoil. Add the suction effect that clay creates against the bucket floor, and an oversized bucket will routinely stall mid-cycle or exceed hydraulic capacity. In practice, stepping down one bucket size from your machine’s rated maximum is the standard approach in clay-heavy conditions. Narrower cutting edges also reduce the surface area fighting that suction on extraction.
Loose Topsoil sits at roughly 2,100 lbs per cubic yard, which gives operators meaningful room to run larger buckets and improve cycle efficiency. This is where maximizing struck and heaped capacity pays off — fewer passes mean faster job completion without stressing the machine. Wide, general-purpose buckets with a smooth floor profile move topsoil cleanly and quickly.
Rock and Hardpan punish any bucket without reinforcement. Soil penetration resistance spikes sharply in these conditions, making narrow, heavy-duty buckets with side-cutter plates the correct choice. The narrower profile concentrates breakout force into a smaller contact zone, improving penetration without demanding more from the hydraulics. A 2.5-ton class machine paired with a rock bucket and carbide-tipped teeth handles hardpan conditions that would quickly damage a standard digging bucket.
Sand presents the opposite challenge — not resistance, but containment. Loose granular material spills easily over low side walls, meaning wide buckets with high side-shrouds are the practical solution. The goal is to capture the full struck volume on every pass and minimize material loss during the swing cycle.
Getting these four material types right is foundational — but selecting the correct geometry and tooth configuration is only part of the equation. How you factor in bucket volume against material density, breakout force ceilings, and long-term GET maintenance all determine whether your machine delivers a genuine return on investment.
Every hour your excavator runs with a mismatched bucket is an hour of productivity left on the table — getting the equation right pays back quickly and compounds over a project’s lifetime.
The core principle running through every section of this guide is deceptively simple: always match bucket volume to material density, not the widest bucket your machine can physically swing. An oversized bucket in dense, compacted soil overloads your hydraulic system, strains the boom, and burns more fuel per cubic yard moved. In practice, a smaller, purpose-matched bucket cycling faster will consistently outperform a larger bucket fighting resistance on every dig.
In high-resistance ground, breakout force is the number that matters most — not bucket capacity. Before sizing up a bucket, check your machine’s rated breakout force against the digging resistance of your soil. Pushing beyond that threshold doesn’t move more material; it accelerates wear on pins, bushings, and the bucket shell itself. As covered earlier, soil density changes everything, and that calculation has to happen before you spec the bucket, not after.
For repetitive agricultural or landscaping cycles, specialized geometries like V-bottom and parabolic profiles earn their keep. According to Construction Equipment Magazine, a bucket shaped to match the soil’s natural angle of repose reduces secondary backfilling and manual reshaping — a tangible time saving across hundreds of passes. Similarly, maximizing attachment ROI on any machine class depends on matching the tool to the terrain from the start.
Audit your Ground Engaging Tools monthly. Worn teeth raise penetration force requirements dramatically, quietly robbing cycle efficiency without triggering any obvious fault. A monthly inspection — checking tooth shank fit, shroud wear, and cutting edge profile — keeps those losses visible and manageable.
Finally, factory-direct sourcing gives operators real leverage. Off-the-shelf buckets compromise on geometry; direct ordering allows you to specify lip angle, wear plate thickness, and tooth spacing against your actual soil profile, delivering a bucket built for your ground rather than an average of everyone’s.
Specific scenarios — from calculating heaped load weight to pairing bucket size with arm length — come up repeatedly in the field, and the next section tackles the most common questions head-on.
Choosing the right excavator bucket comes down to understanding a few recurring technical questions that procurement managers and site leads encounter on almost every project.
How do I calculate the weight of a heaped load?
Multiply the bucket’s heaped capacity (in cubic yards or cubic meters) by the material’s density. For example, wet clay typically weighs around 1,700–2,000 kg/m³, so a 0.5 m³ heaped bucket carries roughly 850–1,000 kg per pass. Always verify that figure sits within your machine’s rated lift capacity at the intended reach. Understanding bucket capacities in combination with your load chart is the safest starting point.
Can I use a larger bucket if I shorten the arm?
In practice, yes — reducing arm length shifts the load closer to the machine’s center of gravity, which improves stability and effective breakout force. Because breakout force is measured at the bucket tip and is influenced by cylinder diameter and linkage geometry, a shorter arm changes that leverage ratio favorably. However, shorter arms reduce dig depth and reach, so this trade-off only makes sense for shallow, high-volume work like bulk loading or topsoil stripping.
What is the best bucket for mixed rocky soil?
A heavy-duty rock bucket with reinforced side cutters, a thicker wear plate, and bolt-on teeth is the standard choice. The narrower profile concentrates breakout force per inch of cutting edge, which matters when you’re cracking fractured rock intermixed with compacted fill. If your site also involves varied attachment needs, exploring multi-tool setups for compact machines can help you build a more flexible fleet strategy.
How often should I replace bucket teeth?
A common pattern is to inspect teeth every 40–50 operating hours and replace them when the wear indicator groove disappears or penetration resistance noticeably increases. Worn teeth force the machine to work harder, raising fuel consumption and accelerating stress on the arm and cylinder seals — costs that far outweigh the price of a fresh tooth set. Staying on a consistent replacement schedule is one of the simplest ways to protect the ROI gains covered throughout this article.