Telephone/WhatsApp:+86 156 2656 0610

Telephone/WhatsApp:+86 156 2656 0610
Email:info@seekmach.com

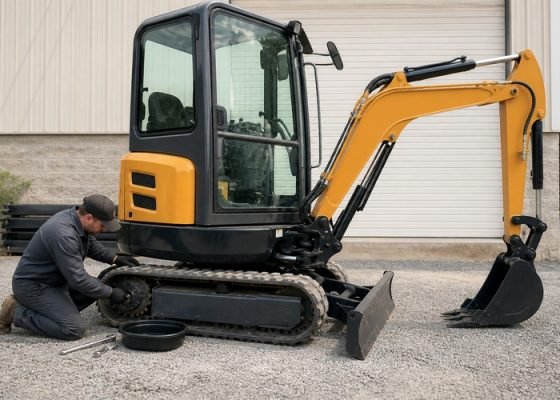
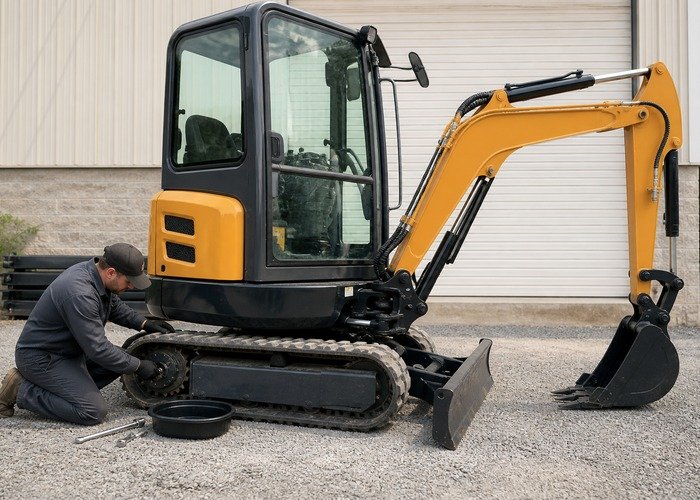
Mini excavator final drive oil protects the reduction gears and bearings between the travel motor and the track sprocket. It is a small volume doing demanding work. A low level, wrong oil, water entry, or metal debris can damage gears and bearings long before the hydraulic system shows a fault. The correct service begins with the model and serial-number manual, not a universal plug position or fluid quantity.
Park on firm level ground, lower the bucket and blade, stop the engine, remove the key, and keep people away from the machine. The drive housing may be hot and can hold pressure. Clean around every plug, loosen slowly from the side, wear eye and hand protection, and contain the fluid. Never crawl beneath an unsupported machine or rotate a track with someone beside it.
This guide explains how to position common two- and three-plug final drives, preserve a useful oil sample, refill to the correct level, and decide when contamination calls for more than a fluid change. Add it to the broader mini excavator maintenance checklist.
Some travel gearboxes use three ports for fill, level, and drain; others use two ports that must be rotated between drain and level positions. Covers, guards, and plug styles vary. Do not mistake a hydraulic motor connection, case-drain fitting, or track-tension grease fitting for a gearbox plug.
Use the manual’s illustration to identify the ports and required orientation. Mark the verified locations in a service photo. Confirm whether the final drives use gear oil or another specified lubricant, the viscosity grade for ambient conditions, refill quantity, plug seal, torque, and service interval. Service both sides and keep their samples separate.
If the machine’s history is uncertain, record hours, travel behavior, noise, leakage, and temperatures before draining. A fresh refill can hide evidence that would have helped diagnose a noisy or slow track.
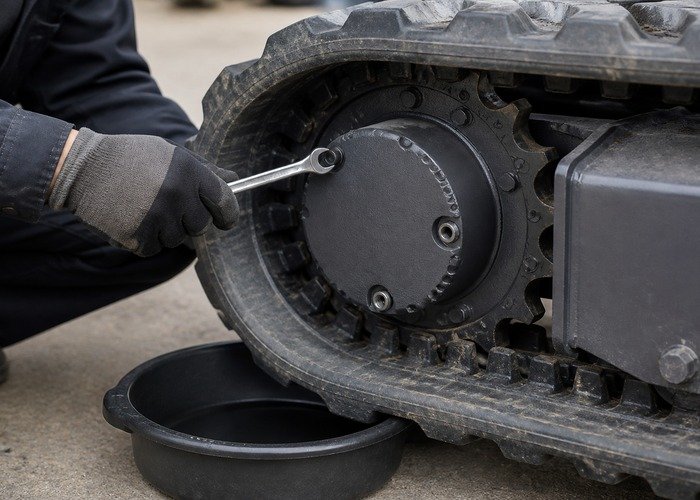
For a common three-plug layout, the drain sits at six o’clock, the level port near three or nine o’clock, and the fill point at twelve o’clock. This is only a common arrangement. Move the excavator slowly and stop in the exact position required by the manual, then lower the attachment and isolate the machine again.
Clean the cover and plug recesses thoroughly. Open the fill plug first when instructed. This confirms that the case can be refilled before the oil is released and allows air to enter during draining. If a plug is seized or damaged, stop and use the approved removal method rather than rounding it and contaminating the housing with grinding debris.
The maintenance section of a mini hydraulic excavator manual specifically instructs technicians to observe drained final-drive oil for metallic particles and foreign material. Always follow the corresponding manual for the machine being serviced.
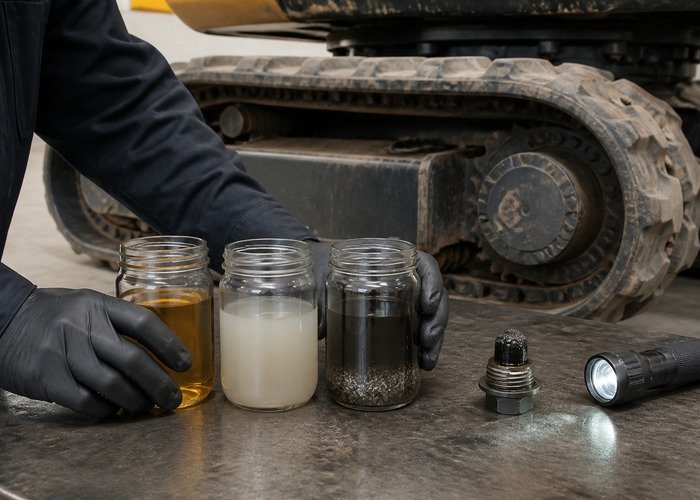
Catch the first oil in a clean transparent container. Label side, hours, date, and plug position. Let it settle. Free water collects separately, emulsified water looks cloudy or milky, and heavy particles settle. Pass a clean magnet outside the container to see whether debris responds, but remember that bronze, aluminum, dirt, and seal material may not be magnetic.
Inspect the magnetic plug before wiping it. A thin smooth paste may be expected depending on service history. Sharp flakes, chips, needles, teeth fragments, or a sudden increase from the previous interval are different. Photograph the plug with scale and preserve the sample if analysis or teardown may follow.
Compare left and right drives. One side containing water or heavy metal suggests a local seal, bearing, or gear problem. Similar overheated oil on both sides may point toward long travel, overload, wrong oil, delayed service, or operating practice.
A low level may come from loose plugs, damaged sealing washers, housing cracks, or a failed floating face seal near the sprocket. Oil tracks behind the sprocket and packed dirt that remains wet deserve inspection. Running low can overheat the remaining oil and damage bearings.
An unexpectedly overfull gearbox is not harmless. Water may have entered, or hydraulic oil may migrate from the travel motor through a failed internal seal on some designs. Compare hydraulic reservoir level and drained volume, then use the service manual. Simply draining to the line leaves the failed path active.
Milky oil points toward water. Examine plug seals, breathers if fitted, cover joints, face seals, pressure-washing practice, and deep-water work. Metal calls for inspection based on shape and quantity. Large particles, rough rotation, a travel-speed knock, or high drive temperature justify removing the machine from service.
Use a stable pan with enough capacity and keep dirt out. Remove the drain plug cautiously and allow time for thick oil to leave gear pockets. Do not flush with diesel, solvent, or unapproved thin oil. If a manufacturer provides a flushing procedure, follow that exact fluid, duration, load, and second-drain process.
Clean plug threads and sealing faces. Replace required washers, O-rings, or single-use plugs. Install the drain plug with the specified sealant and torque. Pump the approved oil through clean dedicated equipment until it reaches the prescribed level opening or measured quantity. Overfilling can churn oil, create heat, and push fluid past seals.
Allow time for oil to distribute, then confirm the level. Reinstall plugs to specification, clean spilled oil, and mark the service. The U.S. EPA used-oil guidance covers storage and management of drained lubricant.
A slow or weak track does not automatically mean bad gear oil. Track tension, packed debris, undercarriage damage, brake release, hydraulic flow, case-drain pressure, travel motor wear, control valves, and pump output can produce similar behavior. Inspect track fit with the mini excavator rubber-track guide.
Compare final-drive housing temperature after the same travel distance and direction. A hot side with metal and noise supports a mechanical gearbox problem. A hot hydraulic motor with clean gearbox oil may require case-drain, pressure, and flow testing. Do not open hydraulic lines to “see if oil comes out.”
If the engine loses power whenever either travel function loads, work through the mini excavator power-loss diagnostic. It helps separate engine, fuel, shared hydraulic, and one-circuit problems.
This video shows a clear general service sequence. Plug orientation, oil type, quantity, torque, and safety instructions must still come from the exact excavator manual.
Notice the value of cleaning before opening and arranging plugs deliberately. A service becomes risky when dirt falls into the housing or the operator discovers after draining that the fill plug cannot be removed.
Keep the first sample out of the main waste pan. If the oil is dumped immediately, water separation and metal evidence disappear. Record the actual amount removed and compare it with the expected capacity.
After refill, use a short low-speed test in a clear level area. Listen in forward, reverse, and gentle turns, then park, cool, recheck the plug area, and inspect for leaks.
| Finding | What it may mean | Next action |
|---|---|---|
| Correct amount, normal appearance | Routine service condition | Refill correctly and establish baseline |
| Low amount, oily dirt near sprocket | Face seal or plug leak | Clean, locate leak, inspect bearings and seal |
| Overfull thin oil | Water or hydraulic migration | Compare fluids and test motor seal path |
| Milky emulsion or free water | Water entry | Repair source and follow approved cleanup |
| Sharp flakes, chips, rough rotation | Active gear or bearing damage | Stop and inspect internally |
| Burnt oil, one hot side | Low level, overload, bearing or brake drag | Temperature and mechanical inspection |
Record product specification, quantity, plug condition, torque, seal parts, drained volume, sample photos, machine hours, and left/right findings. Keep the parts identification process from the mini excavator spare-parts guide. A travel motor and gearbox must be ordered by serial and configuration, not appearance.
When metal is found, budget beyond oil and plugs: track removal, lifting and blocking, sprocket inspection, travel motor or gearbox teardown, seal replacement, hydraulic flushing if migration occurred, and downtime. Review recent overload and shock history, including lifting practices in the mini excavator lift-chart guide.
Keep the machine away from unstable excavation edges during service. The OSHA excavation resource explains site hazards that remain even when the engine is stopped. A general lubricant-condition overview also helps interpret heat, contamination, viscosity, and wear together.
Before draining a machine with a suspected travel fault, complete only the safe tests that the condition permits. On a level clear surface, compare forward and reverse speed, straight travel, gentle turns, deceleration, and stopping. Note whether the machine veers consistently, whether the symptom changes after warm-up, and whether it follows a control direction or a physical side.
Measure the outer housing temperature at the same point on both drives after the same distance. A difference is evidence, not a verdict. Track tension, packed soil, brake drag, bearing damage, hydraulic leakage, and travel-motor load can all create heat. Photograph the track and sprocket condition and record whether the blade and boom were carried in the specified travel position.
After correct refill, perform a short low-speed comparison using the same route. Do not assume new oil repaired a drive that still knocks, heats rapidly, leaks, binds, or travels weakly. Stop, cool the machine, and check plugs, seals, oil level, and evidence of fresh leakage. If the drained oil contained metal, a post-service test should not replace internal inspection.
The first mistake is rotating the hub to a familiar clock position without checking the model. Two-plug and three-plug housings use different fill procedures. The second is draining before confirming that the fill plug can be opened. The third is treating expected capacity as proof of level while the machine is sloped or oil remains in the transfer equipment.
Another mistake is using impact tools on plugs without controlling dirt and thread damage. A rounded or cracked plug can turn routine service into housing repair. Clean recesses, use the correct socket, support the tool squarely, and follow the manual for stubborn plugs. Never heat a housing that contains oil or seals unless an approved professional procedure specifically requires it.
Do not mix the left and right samples or pour the first drain into a contaminated pan. Do not add unidentified leftover oil. Do not apply excessive sealant that can enter the gearcase. Finally, do not pressure-wash directly at the face seal or plug area immediately after service.
Analysis can help when a high-value drive has uncertain history, recurring water, repeated metal, or a hot-side comparison without obvious mechanical damage. Ask the laboratory for sample volume, container, cleanliness, and interpretation requirements. Useful tests may include water, viscosity, ferrous density, particle identification, and elemental wear metals.
A single sample is less informative than a trend. Record oil hours, machine hours, product, top-up amount, repair history, and operating conditions. Send left and right samples separately and tell the laboratory which is which. If a large chip or fragment is already visible, do not wait for analysis before protecting the machine from further damage.
The compact-equipment maintenance resource reinforces using manuals, service intervals, and repair indicators as a connected program rather than isolated fluid changes.
Usually yes. Treat left and right samples separately because one side can develop a local seal, gear, or bearing fault.
No. Use the exact specification and viscosity range approved for the model and climate. Additive and seal compatibility matter.
A smooth paste may be expected, but sharp flakes, chips, fragments, or a sudden increase require investigation against the manufacturer’s guidance.
Possible causes include incorrect filling, water entry, or hydraulic oil migrating through an internal travel-motor seal. Identify the source before continuing.
Stop for large metal, rough or binding rotation, rapid oil loss, severe heat, repeated overfill, travel-speed knock, or unpredictable track response.