Telephone/WhatsApp:+86 156 2656 0610
Telephone/WhatsApp:+86 156 2656 0610
Email:info@seekmach.com

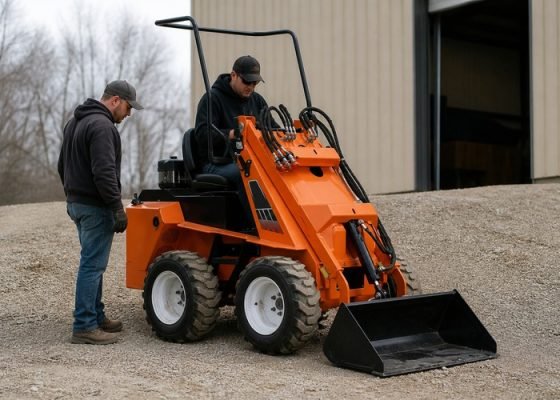
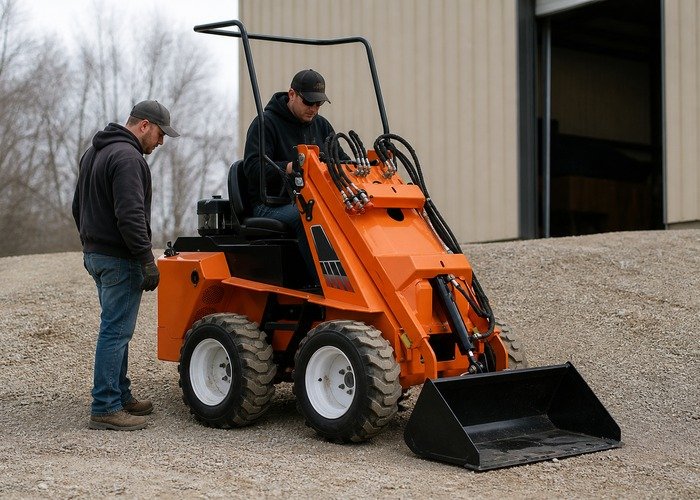
When a skid steer parking brake will not release, do not overpower it with the drive controls, tow the machine casually, or bypass the operator interlocks. Many compact loaders use spring-applied brakes that require electrical commands and hydraulic pressure to release. Others use mechanical pins, cables, or linkages. Forcing travel can burn discs, break pins, damage drive motors, and make the machine move unexpectedly when the fault clears.
Lower the bucket flat, place controls in neutral, keep everyone outside the crush zone, and follow the model’s safe-parking and lift-arm support procedure. If the brake is locked on a slope, chock and recover the machine using the manufacturer’s instructions. Never work beneath raised lift arms without the approved mechanical support device.
Start with the display and the operator sequence, then inspect power, grounds, switches, solenoid command, release pressure, and mechanical hardware. Use the skid steer chaincase oil guide separately for drive-case fluid concerns; the parking brake may be located near the drive system but has its own release mechanism and tests.
Note whether the engine starts, hydraulic lift and tilt operate, drive joysticks enable, the brake lamp stays on or flashes, and a warning code appears. Record code text before cycling power. Determine whether both sides remain locked, one side drags, or the machine moves briefly and then reapplies the brake. Intermittent behavior often points toward a switch, connector, harness, voltage, or speed signal rather than a physically seized brake.
Ask what changed: battery replacement, pressure washing, cab tilt, seat repair, wiring work, hydraulic service, towing, long storage, or brake engagement while moving. Moisture in a connector, a pinched harness after lowering the cab, or an incorrectly adjusted seat bar can appear immediately after service.
Do not erase codes until they are recorded with hour meter, temperature, start sequence, and symptoms. A code is a circuit clue, not permission to replace the named part. Measure the circuit under load and inspect connectors before buying a controller or solenoid.
Use the operator’s manual because the required sequence varies. Common inputs include an occupied seat, fastened belt, lowered seat bar or armrest, closed door, neutral drive controls, brake switch, engine-speed signal, and adequate system voltage. Some machines will run implements but keep traction locked when one input is missing.
Inspect indicator behavior while a second person reads the manual from outside the machine. Do not defeat a switch to test by yourself. John Deere’s operator-manual interlock tests show how seat, belt, brake, and door inputs intentionally apply the brake or inhibit operation.
Confirm that floor debris, a damaged cushion, frozen mud, or loose hardware is not preventing a seat or bar switch from reaching its normal position. Inspect the door latch and connector if fitted. Repair the cause; never tape down a switch or jumper an interlock for continued operation.
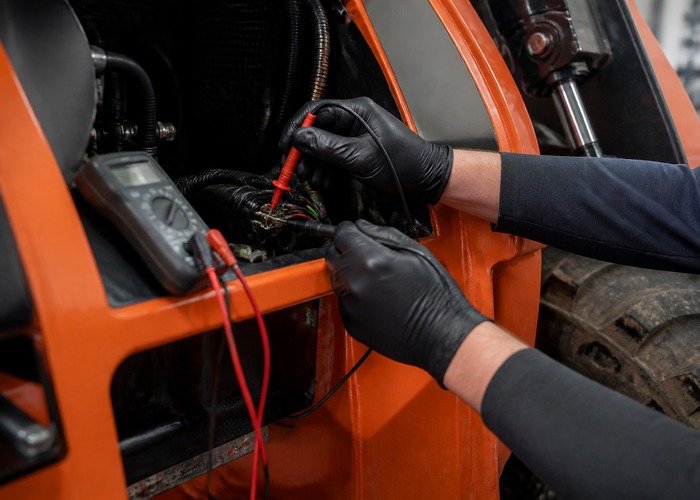
A starter may crank while voltage at the brake controller or solenoid falls too low to release. Measure battery state, charging voltage, and voltage drop through the positive and ground paths under the operating load. Clean and torque connections only after isolation. Green corrosion, overheated terminals, loose grounds, or aftermarket accessories can create intermittent faults.
Test fuses with a meter instead of relying only on sight. Confirm relay coil command and contact voltage under load. Swapping a relay is useful only when the replacement has the same part number and pin function. Do not install a larger fuse; a repeated failure means the circuit must be inspected for a short or overloaded actuator.
Follow the wiring diagram from switches to controller and from controller to brake solenoid. Back-probe only with approved tools that do not spread terminals or pierce insulation unnecessarily. If the harness passes near the cab pivot, lift arm, engine, exhaust, or chaincase, look for rub-through and heat damage.
Use the display’s live-data screen or diagnostic connector when available. Compare seat, belt, bar, door, neutral, brake-button, and engine-speed states with physical operation. A switch can click mechanically yet fail electrically, and a controller may require a changing signal rather than simple continuity.
Check each switch at its connector with power isolated as directed. Then verify supply, ground, and signal voltage in the assembled circuit. Adjust only to the manual’s gap or position. A bent bracket that repeatedly moves out of range should be repaired, not compensated with an unsafe adjustment.
Review general pre-purchase and control checks in the skid steer buying guide. A machine that releases the brake only after wiggling a bar or cycling the key has not passed inspection.
Identify whether the solenoid applies or releases the brake and whether it controls hydraulic pilot pressure, a traction-lock wedge, or a mechanical pin. Listen for a click, but do not treat sound as proof of full travel. A weak coil, corroded plunger, low voltage, damaged connector, or side-loaded linkage may click without releasing.
Measure coil resistance and compare it with the service specification at a known temperature. Check for short to case and inspect the flyback diode if used. Apply external power only when the manual specifically provides a bench-test method, correct polarity, current limit, and maximum duration. Direct battery jumpers can damage controllers or create unexpected movement.
If command voltage is present but current is abnormal, inspect the coil and ground. If command is absent, work backward through controller outputs, interlocks, codes, and power. The S70 operator manual provides an example of brake fault indicators; use the manual for the actual machine.
Spring-applied, hydraulically released brakes need enough pilot or charge pressure to move the release piston. Low oil, wrong viscosity, a restricted filter, air, a weak charge pump, leaking seals, a stuck valve, or low engine speed may leave the brake applied. If lift works but drive remains locked, that does not prove brake release pressure is correct because circuits can have different supplies and thresholds.
Use only the specified test port and a rated gauge. Warm the oil to the stated range and record pressure with the brake commanded on and off. Compare both sides if the design has separate brakes. Never adjust a relief or add shims to raise pressure before verifying supply, filter, solenoid valve, leakage, and specification.
Inspect hydraulic couplers and hoses if recent attachment work preceded the fault, using the skid steer coupler and hose leak check. Keep hands away from pinhole leaks and follow NIOSH hydraulic safety guidance.
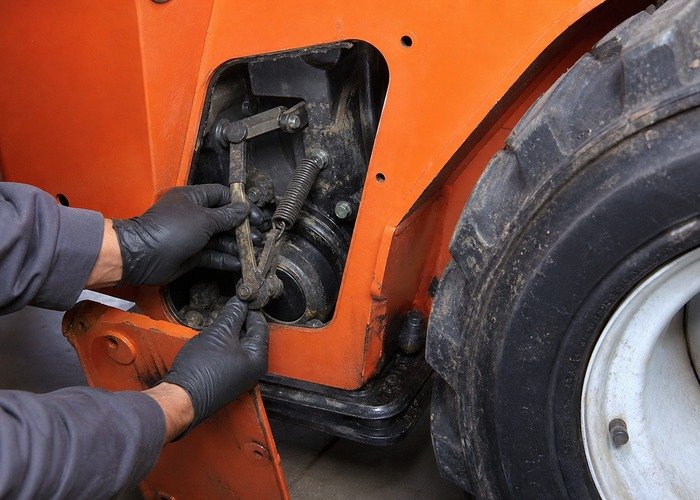
Mechanical systems may use a spring-loaded pin engaging a brake disc, a cable released by the seat bar, or a linkage driven by a solenoid. Side load can prevent a pin from retracting. Follow the manual’s neutral and low-idle procedure; do not rock the machine aggressively or hammer the pin while the drive system is loaded.
With power isolated and the machine safely supported, inspect cable strands, clevis pins, return springs, pivots, brackets, and service covers. Look for mud, rust, broken springs, elongated holes, heat discoloration, and metal debris. Confirm that cab or seat-bar movement reaches the full release stop.
A dragging brake can overheat one side and affect tracking. Check tire pressure and rolling resistance with the skid steer tire pressure guide, but do not mistake brake heat for a tire problem. Replace damaged brake hardware and inspect the drive motor or shaft surface it engages.
The following video documents a skid steer parking brake that would not release because the controller did not receive the expected engine-speed signal. It is a useful example of using a symptom and code to inspect a connector. The rpm threshold, code, sensor location, and wiring are specific to that machine.
Do not assume every no-release complaint is an engine-speed sensor. First record the code and live data. A damaged tone wheel, air gap, supply, ground, connector, harness, or controller input can produce the same missing signal.
Inspect connectors for retention, bent pins, moisture, and corrosion. Pull lightly on each wire from the rear and perform a controlled wiggle test while watching live data. Do not pack an unapproved grease into a connector; use the service procedure and sealing products specified by the manufacturer.
After repair, complete the full start and enable sequence several times at cold and warm temperatures. Confirm that the brake applies automatically when the required safety input changes, not merely that it releases once.
| Observation | Likely direction | Next evidence |
|---|---|---|
| Brake light flashes with code | Interlock or electrical fault | Record code; inspect live switch states and circuit |
| Solenoid command absent | Sequence, switch, wiring, controller | Voltage drop and input/output diagnosis |
| Command present, solenoid silent | Coil, connector, ground, stuck plunger | Resistance, current, manual bench test |
| Solenoid operates, pressure low | Filter, charge pump, valve, internal leakage | Rated release-pressure test |
| Pressure correct, one side locked | Mechanical brake or release piston | Model-specific brake inspection |
If the machine cannot be driven, use the manufacturer’s towing or brake-release procedure. Many skid steers must not be towed with drive motors connected or brakes applied. Use a transporter, winch, rated recovery points, and chocks. Keep people away from the line of pull.
After repair, test on level ground with a clear zone. Confirm brake release, smooth travel, neutral return, automatic application when the seat bar, belt, door, or seat input changes as designed, and secure parking on the permitted grade. Do not test interlocks near traffic, edges, slopes, or workers.
Before returning the loader to production, confirm that its bucket, forks, or other tool is locked and correctly matched by following the skid steer attachment compatibility guide. Correct attachment setup reduces unexpected load and travel behavior during the brake verification.
Document code, circuit readings, release pressure, parts, wiring repairs, and final interlock results. The NIOSH skid steer safety alert explains why approved lift-arm supports, safe entry, and intact interlocks are essential during service.
Handle replaced hydraulic oil, solvent, and contaminated absorbent according to local requirements and the U.S. EPA used-oil guidance. Never leave oily material where it can reach soil, drains, or hot machine surfaces.
A loader that will not move may have a released parking brake but no hydrostatic command. Watch the brake indicator, listen for release, and measure the specified pressure before assuming the brake is holding. A neutral-position sensor, joystick enable circuit, travel pump control, broken coupling, or low charge pressure can produce a similar no-travel complaint.
If the machine creeps or steers as soon as the brake releases, stop the test. Confirm neutral linkage, joystick calibration, controller inputs, and pump swashplate return before trying again. The parking brake is not a substitute for a drive system that fails to return to neutral.
Cold oil, ice around linkage, low battery voltage, and condensation in connectors can combine to prevent release after overnight storage. Use the specified seasonal fluid and allow the approved warm-up period. Do not use flame, boiling water, or an unapproved heater on the brake, valve, wiring, or hydraulic reservoir.
For long storage, clean the machine, protect connectors, charge the battery, and park with the attachment lowered. Exercise and inspect the brake at the maintenance interval rather than discovering corrosion during an urgent job. Any repeated need to cycle the key, tap a solenoid, or rock the machine is a defect to document and repair.
Keep the final electrical readings and release-pressure result with the service record; they provide a reliable baseline when an intermittent fault returns.
No. Forcing drive can damage brake and hydrostatic components and may cause sudden movement. Diagnose or recover the machine correctly.
An intermittent switch, connector, voltage, sensor, controller, or solenoid may reset temporarily. Record codes and test the circuit before it becomes permanent.
No. It may not move fully, receive enough voltage, pass hydraulic flow, or overcome a side-loaded linkage. Measure command and release pressure.
No. Interlocks prevent unintended drive and lift movement. Repair and verify them according to the manual.
Use qualified service for controller output faults, low hydraulic release pressure, internal brake work, damaged interlocks, unsafe recovery, or any procedure requiring raised-cab or lift-arm access.